Hone your PowerShell text manipulation skills
Retrieving content from and modifying content in text files with PowerShell are skills many administrators need to cultivate to aid their automation efforts.
If you are interested in task automation, then learning how to use the *-Content cmdlets for effective PowerShell text manipulation will help with advanced infrastructure management efforts.
Part of your automation activities include modifying text files, which used to mean just flat text, such as files you'd create with the Notepad application. These days, the concept of text includes CSV, HTML, JSON, XML and even Markdown files. PowerShell works with all those filetypes -- and YAML is on the horizon for a future PowerShell Core release -- but this tutorial will focus on working with flat text files.
There are a number of cmdlets available for PowerShell text manipulation: Add-Content, Clear-Content, Get-Content and Set-Content. Also, the Out-File cmdlet can create a text file or write to one. You need to be aware of the changes between the Windows PowerShell and PowerShell Core versions -- especially with encoding -- to manage your files across platforms and across applications.
Creating text files in PowerShell
You can use both Add-Content and Set-Content to create a text file, but they both require content. Start by importing the text after the $txt text string variable in the screenshot.
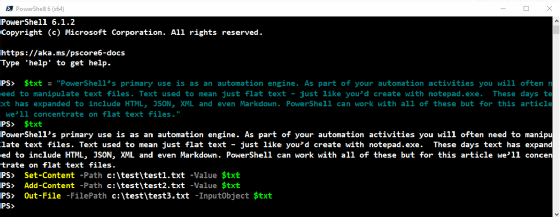
All three of these commands create a text file by saving the text assigned to the $txt variable to a desired path and filename:
Set-Content -Path c:\test\test1.txt -Value $txt
Add-Content -Path c:\test\test2.txt -Value $txt
Out-File -FilePath c:\test\test3.txt -InputObject $txt
You can also use Out-File directly on the pipeline:
Get-Process | Out-File -FilePath c:\test\test4.txt
But if you try:
Get-Process | Set-Content -Path c:\test\test5.txt
Your content will look like this:
System.Diagnostics.Process (ApplicationFrameHost)
To avoid this, convert the data to strings before writing to the file:
Get-Process | Out-String | Set-Content -Path c:\test\test6.txt
You can use Out-File rather than the *-Content cmdlets to avoid the extra processing required with the Out-String cmdlet.
Clearing content from a text file
There are times when it's helpful to know how to clear the contents of a file, so the file is empty and available for reuse. The Clear-Content cmdlet offers an easy means of removing content from a file, such as:
Clear-Content -Path C:\test\test1.txt
The results of the cmdlet empty the contents of the specified file and gives the file a null value as in the following figure:
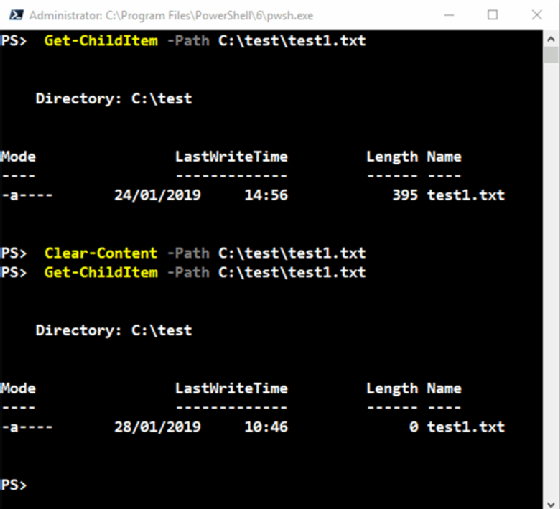
The Clear-Content cmdlet executes in one less step compared to deleting and recreating the empty file. Another advantage is it preserves the permissions on the file.
Modifying content in a text file
Creating text files is a useful activity, but using a script to add content to a file is even more valuable. This script creates a file with 10 server names, one per line:
1..10 |
 ForEach-Object {
 If ($_ -lt 10) {
 $_ | Join-String -OutputPrefix 'Server0' | Add-Content -Path C:\test\Servers.txt
 }
 else {
 $_ | Join-String -OutputPrefix 'Server' | Add-Content -Path C:\test\Servers.txt
 }
 }
The code uses Join-String, which is a feature introduced in PowerShell Core v6.2 preview 3, to create a server name and write it to the file. You could use the following code as an alternative that works in any PowerShell version:
1..10 |
ForEach-Object {
    "Server{0:00}" -f $_ | Add-Content -Path C:\test\Servers.txt
}
With either method, the file will look the same.
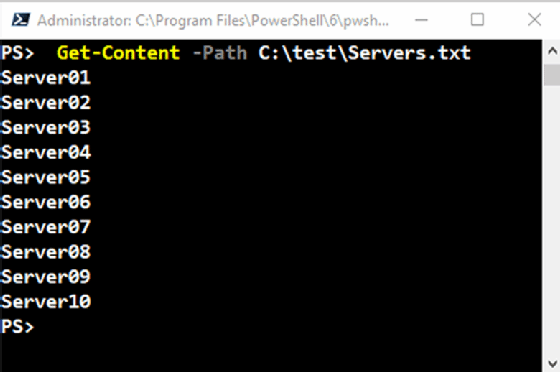
Perform PowerShell text manipulation with two cmdlets
You have two options to modify file content: Add-Content and Set-Content.
Add-Content is nondestructive. It adds (appends) content to the end of the file:
11..15 |
ForEach-Object {
    "Server{0:00}" -f $_ | Add-Content -Path C:\test\Servers.txt
}
This code adds another five server names to the text file created earlier.
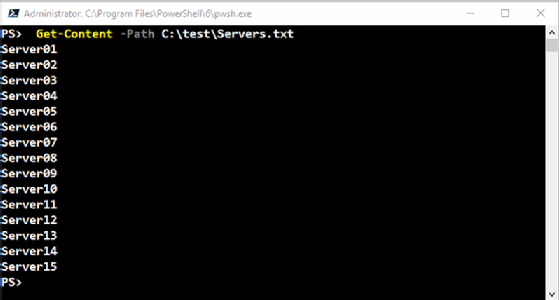
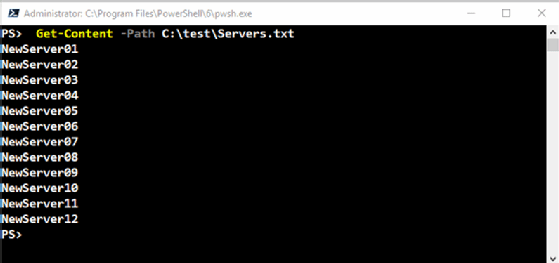
By comparison, the Set-Content cmdlet replaces the current content with new content:
$servers = 1..12 |
ForEach-Object {
    "NewServer{0:00}" -f $_
}

Set-Content -Path C:\test\Servers.txt -Value $servers
This produces the results shown in the following screenshot:
You may need to use some additional parameters available with Add-Content and Set-Content:
- NoNewLine concatenates additional text on a single line.
- Stream specifies an alternate data stream.
- AsByteStream creates the file as a stream of bytes.
Use care when using different PowerShell versions
The Add-Content, Set-Content and Get-Content cmdlets have an encoding parameter that controls the way PowerShell writes the file. If you only use a single version of PowerShell and files that you create will only be read by PowerShell, then you don't need to worry about this.
If you use multiple versions of PowerShell, if your PowerShell files will be read by another application -- possibly on a different OS -- or if you want to use PowerShell to read files created by other applications, then you may need to be aware of encoding.
Just to add another wrinkle to the encoding story, the default encoding changed in PowerShell Core 6.0.
Windows PowerShell uses a mixture of encoding, including ASCII and UTF-16, which may lead to issues when you try to read the files you create. For the most part, PowerShell tends to figure out the encoding for files, but other applications may not be so forgiving.
PowerShell Core 6.0 and later standardize on UTF-8 without a byte order mark (UTF8NoBOM) as the default encoding. The use of UTF-7 should always be avoided. The following cmdlets use UTF8NoBOM in PowerShell Core 6.0 and later: Add-Content, Export-Clixml, Export-Csv, Export-PSSession, Format-Hex, Get-Content, Import-Csv, Out-File, Select-String, Send-MailMessage and Set-Content.
New-ModuleManifest was moved to the UTF8NoBOM standard in PowerShell Core 6.1.
The PowerShell team recommends to explicitly state the encoding with the -Encoding parameter.
Working with the Get-Content cmdlet parameters
Creating and modifying files are useful, but at some stage, you will need to read the contents of a file. The file with the server names is a good example of an instance where you create a file used in your automation efforts.
The Get-Content cmdlet reads files. A typical scenario is to read the file and perform some action on each server:
Get-Content -Path C:\test\Servers.txt |
foreach {Test-Connection -TargetName $_ -Ping -IPv4 -Count 1}
What may not be apparent is the default action reads the file as an array:
$servers = Get-Content -Path C:\test\Servers.txt
$servers.Length
12
$servers[0,5,7]
NewServer01
NewServer06
NewServer08
The PowerShell pipeline unravels arrays and treats each item as a separate object. If the file contents were read as a single block of text, then you'd need to perform additional processing to separate the lines of text. If you don't want the whole file, you can use the TotalCount -- aliased as Head and First -- parameter to read the first n lines of the file:
Get-Content -Path C:\test\Servers.txt -TotalCount 4
NewServer01
NewServer02
NewServer03
NewServer04
The Tail parameter reads the last n lines of the file:
Get-Content -Path C:\test\Servers.txt -Tail 3
NewServer10
NewServer11
NewServer12
For large files, you may need to use the ReadCount parameter to control the number of lines sent through the pipeline at one time. The Raw parameter ignores a new line character and returns the entire contents of the file as a single string:
$servers = Get-Content -Path C:\test\Servers.txt -Raw
$servers.Length
156
$servers[0,5,7]
N
r
e
The length of the string matches the file size. If you attempt to select an element from the array, then you'll get individual characters as shown.
Some other parameters of interest include the following:
- Wait keeps the file open while checking and displaying new content once per second. Use CTRL+C to close the file.
- Stream gets the contents of the specified alternate file stream
- AsByteStream dictates that the content should be read as a stream of bytes. This parameter was added in PowerShell Core 6.0. For Windows PowerShell, use the Byte parameter for the same result.
It’s worth noting that complete explanations of all PowerShell cmdlets and parameters are available and searchable directly from Microsoft PowerShell online documentation. For PowerShell 7.3, the documentation starts here.
Editor's note: This article was republished after a technical review and light updates.


