
Where do Zoom recordings go? How to find, access, and manage them
Depending on your initial settings, Zoom recordings can be found locally on your computer or in the Zoom cloud. Find out how to navigate the Zoom recordings menu.

Zoom was designed to be easy to use. You simply click a link to join a meeting. After entering the meeting room, only a few buttons appear on the screen to control the most important features. One of these buttons -- and one of the most popular features -- is the Record button. For various reasons, many video callers and meeting organizers need to record their meetings and webinars.
Recording a meeting is quite easy. Simply click the Record button at the bottom of your Zoom window, and choose whether to record it locally on your computer or in the cloud. But which should you choose, and how do you access these recordings once the meeting is done?

Whether it's a local Zoom recording or a Zoom cloud recording is your choice or the choice of your company. Recording to the cloud offers more features such as AI summaries and coaching, multiple recording layouts, transcriptions and the ability to share recordings directly with a link, among other capabilities. Recording to your computer is an option if your company has security policies against hosting company recordings in cloud storage.
The recording location of your meeting depends on your Zoom settings. Also, the meeting owner may be the only person with access to the recording, and the owner may need to share the recording with the meeting participants. You can find Zoom recordings either locally on your computer or in the cloud, depending on your initial recording settings.
Where are Zoom recordings saved on my computer?
In the past, finding and accessing your local and cloud Zoom recordings was a bit of a manual process. However, a revamped Zoom Workplace app makes it easier to access both sets of recordings.
If you've ever been in a Zoom meeting, the Zoom Workplace app should already be downloaded to your computer. If not, you can get it here. After installing the app on your PC or Mac, just search for and open the app as you would any other app.

After opening the app, use the tabs at the top to navigate to your Home screen, which should look like this.
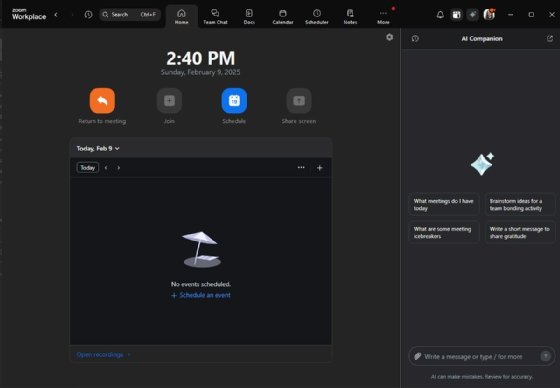
At the bottom left, there's a blue link that says Open recordings. Clicking this link opens the Zoom Recordings menu, which looks like this.

At the top, there are tabs for cloud and local recordings. Under each tab, you can see a list of recording files.
For cloud recordings, you can view them directly within this menu, with full access to AI summaries, coaching and other online features. You can also get a link to where it is hosted online and access sharing settings.
For local recordings, you can open and view them on your computer's media player and access the local recording folder where they are stored.
How to find Zoom recordings on a PC or Mac
The Zoom Workplace app menu simplifies managing Zoom recordings, as you have access to cloud and local recordings in one place. However, in case you need to access your recordings manually, you can find them on your PC or Mac in the following file paths:
- Windows: C:\Users\[Username]\Documents\Zoom
- Mac: /Users/[Username]/Documents/Zoom
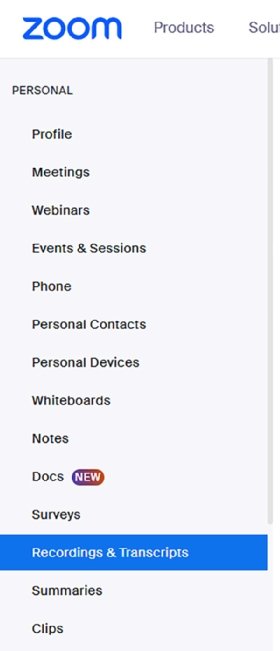
If you need another way to access your online recordings, you can log in to your Zoom account at Zoom.com and click on the Recordings & Transcripts tab in the left menu.
How to change Zoom recording settings
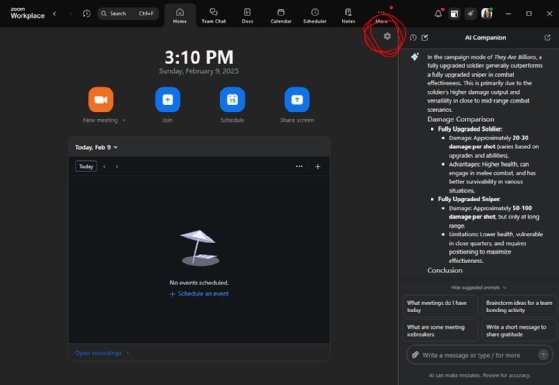
If you need to record Zoom meetings, you should ensure the settings are optimized for you. Let's start with the local recording settings, which can be found in the Zoom Workplace app. First, click the small cog at the top-right corner of the Zoom Workplace home tab.
Next, in the Settings menu, there's a tab on the left for your Recording settings, which should look like this.

The settings are generally easy to understand, and many of them have a small question mark icon, which you can mouse over for more information.
To access your online settings, log in to your account at Zoom.com, click the Settings tab on the left and then click the Recording tab at the top.
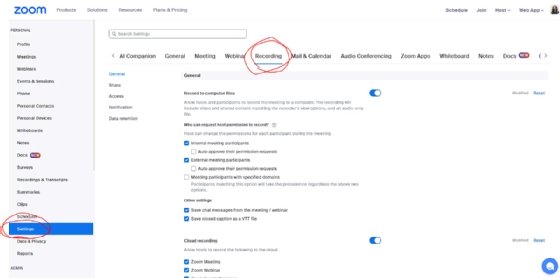
Again, the settings are easy to understand, and many have helpful information. It should only take a couple minutes to review the settings to ensure your recordings are fully enabled with the features you need.
How to recover deleted recordings
Everyone knows the feeling of accidentally deleting a recording. Or maybe you deleted a recording on purpose, and someone later tells you the recording was needed. Fortunately, depending on the type of file, how it was deleted and how long ago, you may be in luck.
For local recordings, if you delete the file manually, it should go to your Recycle Bin -- just like any other file -- and be retrievable. However, if you use the Delete button in the Zoom Workplace Recordings menu, the file does not go to the Recycle Bin. It is permanently deleted, so be careful.

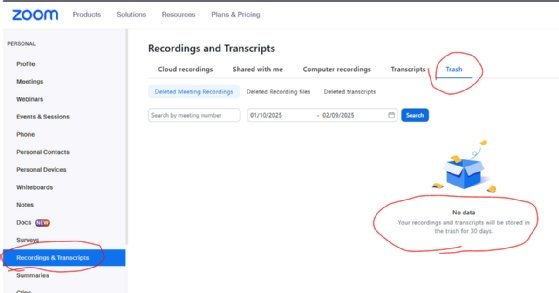
For cloud recordings, Zoom provides a Trash folder that functions like the Recycle Bin on your computer. It saves deleted recordings for 30 days and then deletes them. So, if you delete a cloud recording, you have 30 days to save it.
Video meeting recording and management of those recordings are important aspects of enterprise collaboration security and privacy. Organizations and their employees should follow company best practices and policies to ensure video recordings are properly managed.
Editor's note: This article was updated to reflect Zoom's new interface and meeting recording workflows.
David Maldow is founder and CEO of Let's Do Video. He has written about the video and visual collaboration industry for almost 20 years.