filo/DigitalVision Vectors via G
How to create Azure Blob Storage accounts
Follow these steps and best practices for how to create Azure Blob Storage. Keep security in mind as you move through the important, detailed process.
Azure Blob Storage, Microsoft's object storage, is massively scalable and suitable for a variety of different uses. But users need to know where to start.
This tutorial details how to create Azure Blob Storage accounts. Even though Azure Blob Storage consists of flat object storage, the deployment and management of blobs -- individual files stored within Azure Blob Storage -- has a hierarchy. An Azure Blob Storage account is at the top of the hierarchy. Within that storage account, you can create one or more containers. Each of these containers can store one or more blobs, or files. Each blob must exist inside of a container.
Create an Azure Blob Storage account
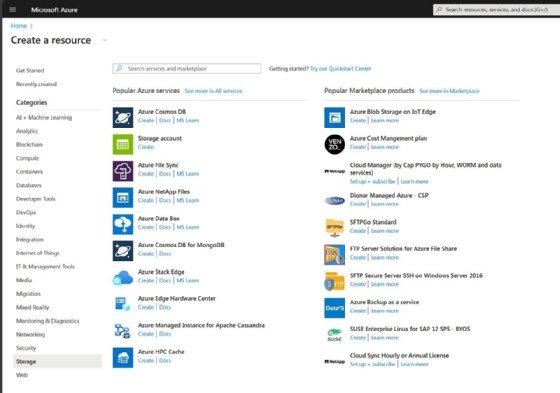
Before you can provision any Azure Blob Storage, you must set up a storage account. To do so, log in to the Azure portal. Next, click on the Create a Resource icon, and then select the Storage tab. Locate the Storage Account service, and click Create, as shown in Figure 1.

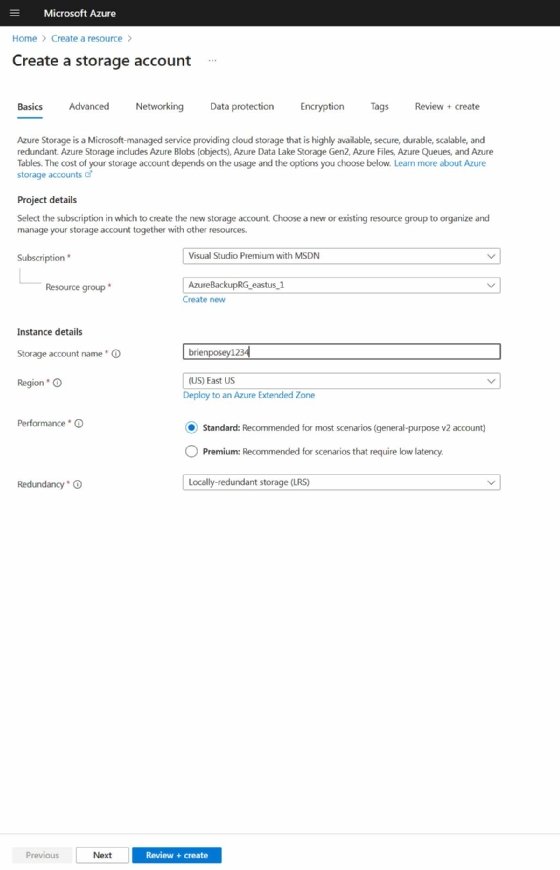
At this point, you are taken to the Create a Storage Account screen, shown in Figure 2.
The storage account determines the type of storage and the level of redundancy that exists for each container -- and the blobs within them -- connected to the storage account. To control costs for your blob storage, create multiple storage accounts so different blobs can benefit from varying levels of storage performance and redundancy.
The name for your storage account must be unique -- not just within your Azure account, but across all of Azure. Consider using your account name as the root of the storage account name and then appending additional information reflecting the account's purpose or characteristics.
Select your subscription, and then choose your preferred resource group. Supply a name for the storage account you are creating, and select the region for the account. Finally, select your preferred level of performance and the level of redundancy you need. When you are done, click the Review+Create button, followed by the Create button, to create the storage account.

Create containers
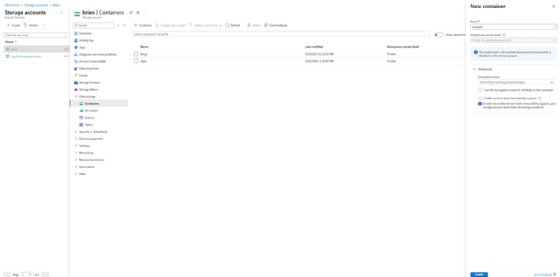
Now that you have created a storage account, you need to create at least one container. Go to the list of Azure services, and click Storage. Click on the Storage accounts option, and click on the storage account that will store the container you are about to create. Expand the Data Storage tab, and then click on Containers.
To create the container, click on the +Container icon, and then provide a name for the new container. You also need to choose an access level. Normally, containers should be configured to avoid anonymous access unless you have a compelling reason to allow it.
You can enable encryption or version-level immutability by selecting the corresponding checkbox from within the Advanced section. The access level, encryption and immutability settings you select also apply to all blobs created within the container.

Once a container has been created, you can click on it to access the container's page. Here, you find the option to upload blobs to the container. You can also use this page to control the access policy, configure the container's properties or diagnose any problems.
Brien Posey is a 22-time Microsoft MVP and a commercial astronaut candidate. In his more than 30 years in IT, he has served as a lead network engineer for the U.S. Department of Defense and a network administrator for some of the largest insurance companies in the U.S.


