tashatuvango - Fotolia
PowerShell scripts enable automated cloud deployments
This step-by-step tutorial walks through the process to automate an Azure deployment; start with launching the virtual server, and finish with the deletion process.
Programmatically repeatable processes are a major concept in cloud computing. Infrastructure deployment via the graphical interface takes time, and human error can creep in. IT administrators should learn to build automated cloud deployments.
There's a breadth of infrastructure provisioning tools available with automation capabilities. Administrators can adopt PowerShell to automate cloud and on-premises deployments across Microsoft products. The following steps guide a PowerShell user through Microsoft Azure deployment via the Azure PowerShell cmdlets.

The steps in this tutorial create and launch a virtual server on Azure. An infrastructure as a service (IaaS) cloud deployment occurs in two sets of processes: the initial setup of networks, firewalls, resource groups and storage and then the creation and deployment of VMs for workloads.
Before you deploy a VM into Azure's IaaS environment, know the requirements for the service or infrastructure that will run there. If you perform the process correctly first, you will save time later. With the initial setup values in place, cloud admins skip the tedious process to add each item into the command directly.
This deployment relies on a resource group that puts together logically related work items. Using resource groups makes it easier to manage the included items. Your cloud deployment will be tidy, and you can take action on the resource group rather than each component.
Build the infrastructure
To start the automated cloud deployment, open PowerShell, and log into Azure using the command:
Login-AzureRMAccount
It is assumed that the PowerShell cmdlets have been installed ahead of time. If not, download them here. Go to the tools list, select PowerShell then select Windows install.
Enter your Azure credentials when prompted -- the output will show your subscription ID and other items. Create the required resource group that will contain all the VM items:
New-AzureRmResourceGroup -Name TechTargetTestGroup -Location "East US"
Substitute the name entry TechTargetTestGroup for one of your own creation. Give the resource group a useful and recognizable name, such as what application it will host. Lastly, use whichever Azure location you desire; this tutorial uses the East US region.
Configure the underlying network items for network connectivity in the resource group. This includes networks, subnets, public IP addresses and network security groups.
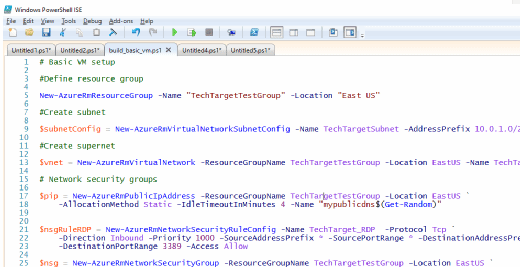
The code below assigns all important items to variables, which are denoted by the $ character. Eventually, commands utilize the variables, in place of the text of the variable. Cloud automation in this way makes work much easier.
Within Azure, the deployment needs a network to carve a subnet from:
$subnetConfig = New-AzureRmVirtualNetworkSubnetConfig -Name TechTargetSubnet -AddressPrefix 10.0.1.0/24
The network range in this example is defined as 10.0.1.0/24. Create the virtual network, specifying the subnet:
$vnet = New-AzureRmVirtualNetwork -ResourceGroupName TechTargetTestGroup -Location EastUS -Name MYTTNET -AddressPrefix 10.0.0.0/16 -Subnet $subnetConfig
The server needs a public IP address, which is assigned at random:
$pip = New-AzureRmPublicIpAddress -ResourceGroupName TechTargetTestGroup -Location EastUS `
-AllocationMethod Static -IdleTimeoutInMinutes 4 -Name "mypublicdns$(Get-Random)"
The networks and public IP address are now configured. Network security groups (NSGs) are the equivalent in an Azure deployment of firewall rules, applied to one or many items or resource groups to manage access.
The rules below cue the NSG for inbound Remote Desktop Protocol (RDP) traffic and create the group.
$nsgRuleRDP = New-AzureRmNetworkSecurityRuleConfig -Name TT_Security_rule_RDP -Protocol Tcp `
-Direction Inbound -Priority 1000 -SourceAddressPrefix * -
SourcePortRange * -DestinationAddressPrefix * `
-DestinationPortRange 3389 -Access Allow
$nsg = New-AzureRmNetworkSecurityGroup -ResourceGroupName
TechTargetTestGroup -Location EastUS `
-Name myNetworkSecurityGroup -SecurityRules $nsgRuleRDP
Now, join together the IP and the security configuration:
# Create a virtual network card and associate with public IP address and NSG
$nic = New-AzureRmNetworkInterface -Name myNic -ResourceGroupName
TechTargetTestGroup -Location EastUS `
-SubnetId $vnet.Subnets[0].Id -PublicIpAddressId $pip.Id -
NetworkSecurityGroupId $nsg.Id
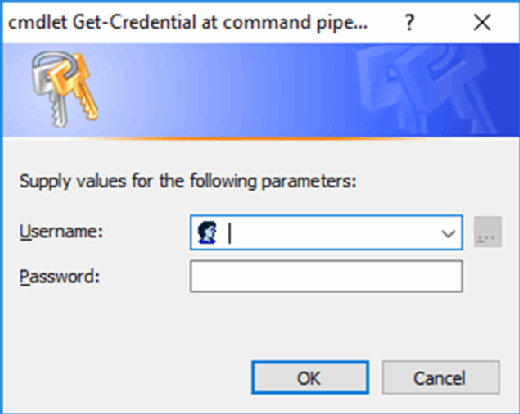
There are several ways to set up the administrator account in an Azure deployment. The code below gets the user credentials input in the username/password book and puts them into the $cred variable.
$admindetails = Get-Credential

Deploy VMs on the Azure infrastructure
The prep work is done, and the administrator can now specify the VM size and OS type. The command uses all those variables set up in the first half of the tutorial.
To specify publishers from Azure Marketplace for your desired system image types, follow Microsoft's instructions, or for the braver amongst us, use the PowerShell command:
Get-AzureVMImage | Where-Object {$_.OS -like 'Windows' -and $_.PublisherName -like 'Microsoft Windows Server Group'} | select Label, OS, PublisherName | FT
In a similar fashion, obtain the types and sizes of available VMs using a Get command:
Get-AzureRmVmSize -Location "East US" | select Name, NumberOfCores, MemoryInMB
This example showcases a small A0-sized general-purpose VM. The code below essentially pulls together all the configuration items into the vmConfig variable, ready to be executed.
$vmConfig = New-AzureRmVMConfig -VMName TechTest1 -VMSize Standard_A0 | `
Set-AzureRmVMOperatingSystem -Windows -ComputerName TechTest1 -Credential $admindetails | `
Set-AzureRmVMSourceImage -PublisherName MicrosoftWindowsServer -Offer WindowsServer `
-Skus 2016-Datacenter -Version latest | Add-AzureRmVMNetworkInterface -Id $nic.Id
With these components in place, build the VM using the command shown below, substituting your details for those in the example:
New-AzureRmVM -ResourceGroupName TechTargetTestGroup -Location EastUS -VM $vmConfig
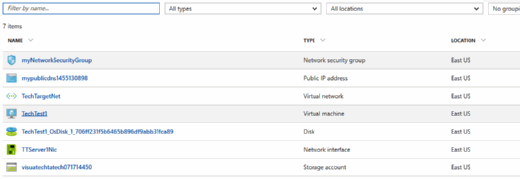
It will take several minutes to build the VM and even longer for the remote desktop connection to become available. To check the progress, log into the Azure portal, navigate to the resource group and click on the VM. If it is still building, it will report Creating. Eventually, if all went according to plan, PowerShell will report success.

To connect to the VM created earlier, click the Connect icon from the Azure VM ribbon. This will prompt the download of an RDP configuration file that can be read and imported by the RDP client.

Finally, those powered-up servers will consume resources in your cloud deployment. To delete the entire environment, navigate to the resource group, select Delete and input the resource group name. It will remove all the setup that you created. This action illustrates why an administrator's life will be easier if they group the components together into logical items.
These fundamentals enable an administrator to automate deployment of VMs on Azure IaaS. All of the Azure services are available via PowerShell, and an admin can set up and consume them in the same fashion.


