beawolf - Fotolia
Perform this infrastructure as code tutorial with Pulumi and AWS
Learn the basics of an infrastructure as code deployment with this tutorial, which features the open source tool Pulumi, along with Python and AWS.
Infrastructure as code tools enable development and IT operations teams to consistently deploy resources across various cloud computing platforms.
One such tool is Pulumi, an open source and multi-cloud development platform that enables IaC deployment practices, as well as version control. The tool supports multiple languages, such as JavaScript, Python and Go. Engineers can use their preferred programming language to define, create and update cloud services on AWS, Microsoft Azure and Google Cloud Platform, rather than have to learn and use a cloud-native configuration tool like Azure Resource Manager or AWS CloudFormation.
Pulumi is an alternative to Terraform, which relies on a custom, domain-specific language or the HashiCorp Configuration Language. Since Pulumi forgoes this prerequisite, users can start to write infrastructure configurations with less upfront training.
To get a sense for Pulumi's benefits, such as consistency throughout the development and operations processes, follow this infrastructure as code tutorial to create a Linux web server on AWS using Pulumi and Python.
Download and install Pulumi
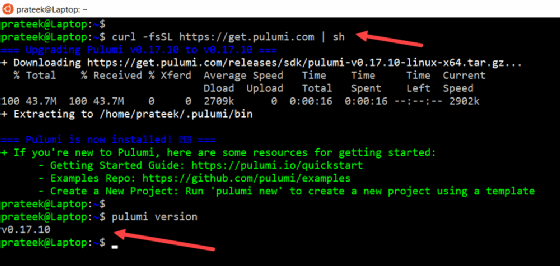
To install Pulumi on Linux, run the following command from the shell, which will download a script and the latest SDK from the Pulumi website:
curl -fsSL https://get.pulumi.com | sh
Then, set up the environment variable pointing to the Pulumi command-line interface (CLI). Run the following command to ensure installation was successful and that the PATH variable is set up:
pulumi version
Install and configure AWS CLI
Pip, the standard package manager for Python and preferred distribution method for the AWS CLI on Linux, provides a simple way to install, upgrade and remove Python packages and their dependencies. For those with Python 3.0 or above installed, use the following pip3 command to install the AWS CLI:
pip3 install awscli --upgrade –user
Then, use -version, as shown below, to validate the AWS CLI installation.
aws -version
Once the installation is complete, create a user in the AWS console that has programmatic access:
- Launch the Identity and Access Management console in AWS and navigate to Users.
- In the pop-up window, click Add User.
- In the new window, provide a username, choose Programmatic Access for access type and click Next.
- To set permissions, choose Attach existing policies directly. There are several permission levels to choose from, but for this IaC tutorial, enter AmazonEC2FullAccess into the policy type filter, and select the checkbox next to that policy. Then, click the Next.
- Review the user and permission levels, and click Create User.
- The next page will show the access ID and secret key. These are only available once, so download and save them in a secure location.
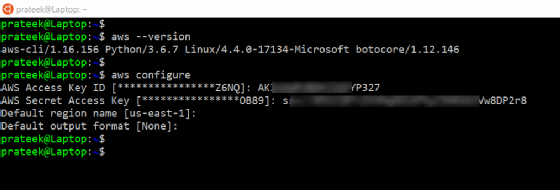
After obtaining the access ID and secret key credentials, configure them in the shell. Run the following command, and, when prompted, provide the credentials obtained in the previous section:
aws configure
Configure Pulumi for Python
Pulumi supports IaC programs written in Python 3. To configure Pulumi for Python, run the following command to scaffold a directory structure and create a Pulumi.yaml file that will contain metadata about the project, such as project name, description and runtime, which can be modified later. Before working with a __main__.py file that contains the infrastructure deployment, use a requirements.txt file to specify any dependencies or a cloud provider, such pulumi-aws.
mkdir hello-world-webserver
cd hello-world-webserver
pulumi new python
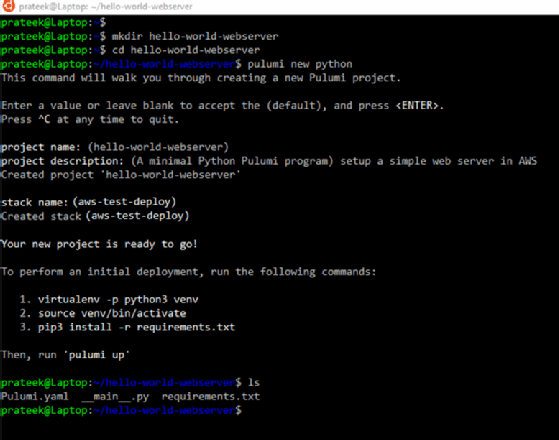
Once the project is ready, add any dependencies in the requirements.txt file and the Python code to the __main__.py file, as demonstrated in Figure 4.
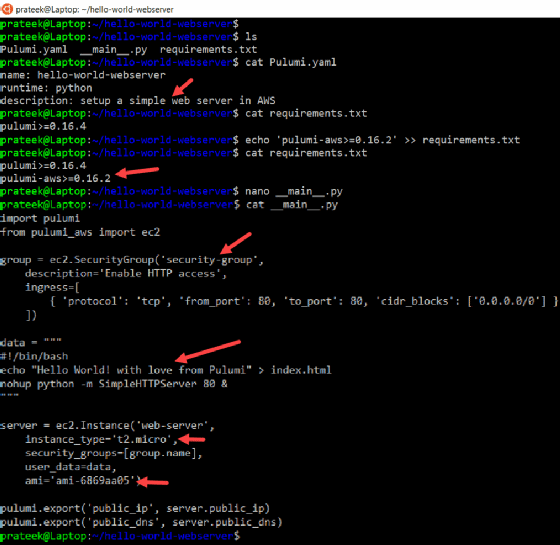
The Python file program launches an AWS EC2 t2.micro instance, with the Amazon Machine Image (AMI) ID ami-6869aa05, which is for a Linux server. Then, it creates an AWS security group with an HTTP port 80 inbound rule and passes any user configurations, such as web server setup, to the instance that is launched. The program ends with pulumi.export() to return a public IP address and DNS names as output and to validate the configurations post-deployment.
Deploy infrastructure as code with Pulumi
Once the project is set up with dependencies and the Python program, run pip install on the requirements.txt file, as shown below. This will discover and download any package dependencies before running the infrastructure deployment.
pip install -r requirements.txt
Next, create a new stack -- an isolated instance of a Pulumi program that defines distinct phases of the code's lifecycle, such as development, staging and production -- as shown below.
pulumi stack init aws-test-deploy
Now, configure the AWS region where the EC2 instance should deploy.
pulumi config set aws:region us-east-1
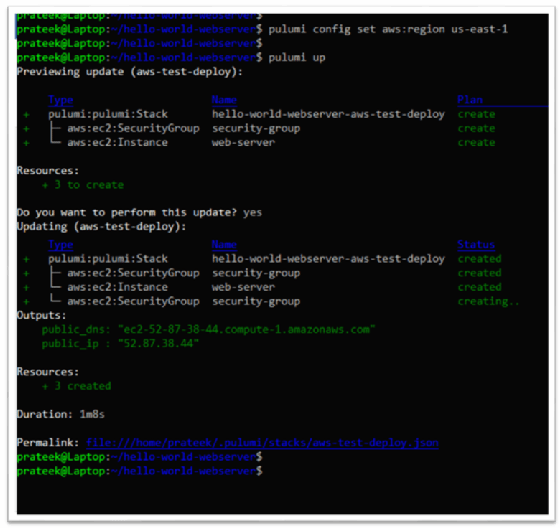
Run the pulumi up command to preview and deploy the resources, as demonstrated in Figure 5.
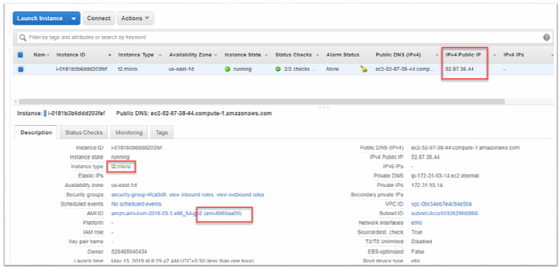
Now, from the AWS EC2 console, validate that an EC2 instance launched with the specified IP address and with the AMI ID mentioned in the Python program.
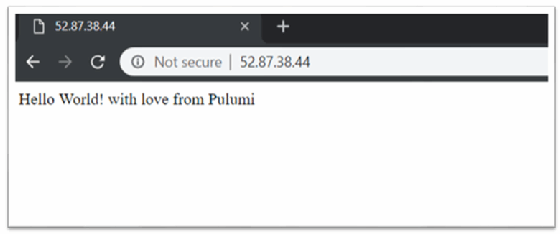
The final step in this infrastructure as code tutorial is to validate the web server. Open a web browser, and enter the IP address of the newly created Linux web server. There should be a webpage hosted with the data provided to the Python program, as shown below.
