
Getty Images
Manage IT infrastructure with NSX's multi-tenant features
VMware NSX now supports multi-tenancy, which can help admins manage complex IT environments. Explore what's new and get started with this step-by-step walkthrough.
Although VMware built NSX with multi-tenancy in mind, the network virtualization and security platform did not fully support multi-tenant architectures until recently.
In many IT environments, a team of infrastructure administrators with access to all system components manages the entire setup. But in some cases, certain groups might only need access to part of the overall IT infrastructure -- for example, departments, branches or project teams that want to manage their own networking or security setup.
Historically, VMware NSX used a tiered gateway model, in which IT admins could isolate networks between tenants and see all objects, but could not manage objects at a tenant level. Although NSX introduced Multi-tenancy in version 4.0.1, it was only configurable through the API, an admin-unfriendly option.
Following NSX updates in late 2022, however, admins can create objects in projects, which map to tenants. They can then assign tenant users to roles, allowing them to manage tenant-specific objects such as tier-1 gateways, segments and firewall rules. This multi-tenancy feature is offered natively in the NSX user interface and does not require integration with VMware vCloud Director.
Walkthrough: Configure VMware NSX to manage a multi-tenant architecture
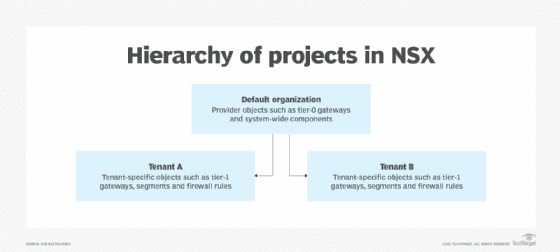
Figure 1 shows the hierarchy of projects within the default organization, which contains the provider objects such as tier-0 gateways, overall firewall rules and other system-wide components. In this example, two projects -- i.e., tenants -- were created with tenant-specific objects, such as tier-1 gateways, segments and firewall rules.
To start using NSX's multi-tenant capabilities, start by creating a project using the project switcher drop-down menu in the NSX title bar. Figure 2 shows the default project, which is used for the provider configuration, and three projects representing the tenants. The default project cannot be edited or removed.

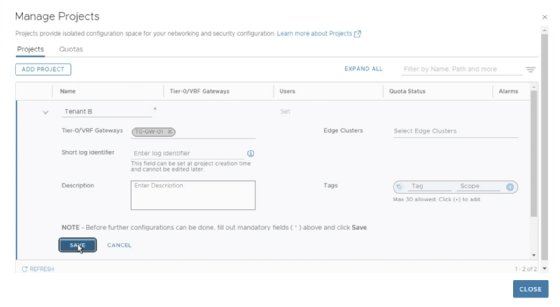
When creating a project, provider admins can also assign tier-0 gateways and edges for tenant use. Figure 3 shows configuration options for an example project. The short log identifier is used in log entries for objects that belong to a tenant, enabling provider admins to find tenant-related entries in their centralized logging system.
For each project, provider admins can set quotas limiting the number of items that each tenant can create. Figure 4 shows an example of networking limits, setting a maximum of one tier-1 gateway, eight segments and four network address translation (NAT) rules.

In the Security and Inventory tabs, admins can also set limits on the number of firewall policies and rules, and the number of custom services and groups, respectively.
Created projects are found in the User Management section, as shown in Figure 5.
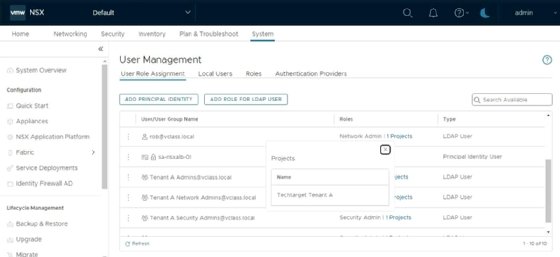
Assigning roles to users for a specific project limits their access to only those objects associated with the assigned project. When these users log in, they will only see their own project listed in the project switcher drop-down list and will be unaware of other tenants.
Provider admins can assign users to different roles, such as network or security administrators, which further limits the types of objects they can work with. Users within a tenant group who are assigned the project admin role can manage user role assignments for that tenant.
In the example shown in Figure 6, the tenant administrator user can only see the TechTarget Tenant A project from the project switcher menu. Likewise, only the tier-1 gateway object created within that project is visible.
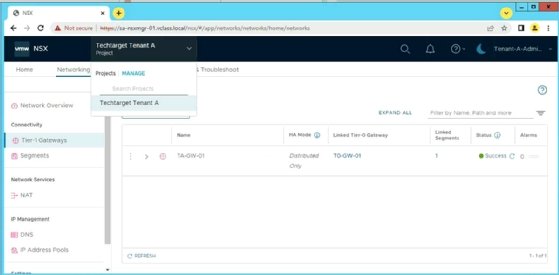
Because tenant users don't have access to the System tab in NSX, they can't manage -- or even see -- infrastructure components such as transport nodes and management appliances.
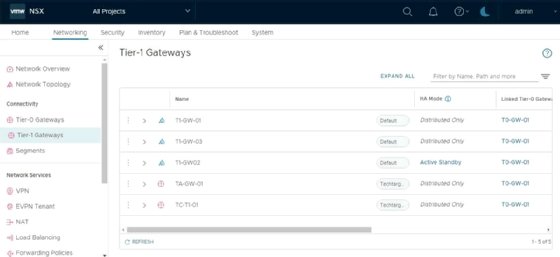
A provider administrator at the enterprise admin level can manage all projects. The All Projects entry in the project switcher shows all objects from all tenants. Figure 7 shows several tier-1 gateways with a new column that shows the project associated with an object.
By switching between projects, provider administrators can also create objects for tenants.


