kentoh - Fotolia
Import and export Hyper-V VMs with Hyper-V Manager and PowerShell
When migrating VMs, admins can use Hyper-V Manager's export and import capabilities for small sets of VMs or PowerShell for larger migrations from one host to another.
Using the hypervisor's import and export capabilities through the Hyper-V manager is an easy method for moving or copying Hyper-V VMs. This helps in situations where IT administrators must move a small handful of VMs from one host to another. But admins dealing with a large amount of Hyper-V VMs should consider PowerShell's export and import capabilities to ensure successful VM migration at scale.
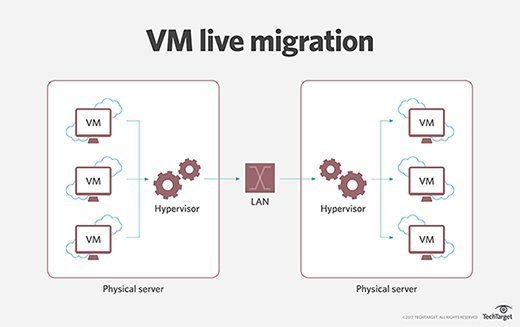
Admins might overlook the benefits of importing and exporting VMs. Many often move production VMs between hosts via live migration, and they can also perform VM migrations using backup software.
However, Microsoft Hyper-V Manager and PowerShell's import and export features have their place. For example, admins can export any unneeded VMs into an archive for later use.
Export and import VMs with Hyper-V Manager
Microsoft enables admins to easily export Hyper-V VMs directly through the Hyper-V Manager. To do so, admins must select the VM that they want to export, and then click on the Export link found in the Actions pane. Hyper-V then prompts admins to specify the location they want to export the VM files to. After entering the destination path, Hyper-V performs the export.
Admins commonly use Hyper-V Manager's export feature to create a series of Hyper-V VMs in a lab environment, and then export those VMs so they can later import them into a production host. Admins can also clone VMs while using the export feature, which enables them to create several similarly configured VMs. Using the import and export functions to clone VMs is often simpler than trying to accomplish the task using backup software.
Importing a VM through the Hyper-V Manager is almost as easy. Admins can click on the Action pane's Import link, and Hyper-V Manager launches the Import VM wizard. Admins can then click Next to bypass the wizard's Welcome screen, and then it guides admins to a prompt to enter the imported VM's location. Admins must select the folder bearing the VM's name and click Next, which takes them to a screen that confirms the presence of the VM within the folder. Admins must select the VM that they want to import, and then click Next.

Admins will see a prompt from the Hyper-V Manager that provides three available methods for performing the import process: Admins can register the VM in place, restore the VM or copy the VM. Admins must select an option based on the reason they want to import the VM.
If admins have previously placed VM files in their desired destinations and want to start the VM in its current location, they might choose to register their VM in place. If admins store their VM files in a file share or removable drive and require Hyper-V Manger to move the files to their desired destination, they might choose to restore the VM. Finally, if admins have a set of VM files they must import multiple times, they might choose the copy VM option.
If admins opt to register the VM in place or to restore the VM, then clicking Next takes admins to a summary screen where they can click Finish to launch the import process. However, if admins chose to copy the VM, clicking Next guides them to a screen where they can provide destination paths for the various VM components.
Use PowerShell to import and export vast amounts of VMs
Although Hyper-V Manager works well for importing and exporting VMs, most admins primarily use it in one-off situations where they must export a select number of VMs. Admins can select the VMs that they want to export, click the Export link and export the selected VMs simultaneously.
However, for true bulk import and export operations, admins should use PowerShell. PowerShell enables admins to automate tasks at-scale and provides greater flexibility when dealing with large amounts of VMs.
The PowerShell cmdlet used to export VMs is Export-VM. This cmdlet requires admins to provide the VM name and the export path:
Export-VM -Name MyVM -Path D:\
If admins want to export every single VM within a host, they can combine this command with the Get-VM cmdlet:
Get-VM | Export-VM -Path D:\
PowerShell does not require the admin to specify VM names. This is because the Get-VM cmdlet itself provides the names for admins.
Admins can import a VM using the Import-VM cmdlet. If admins register the VM in place, then they must provide the VM path. For example, to register a VM from Microsoft, an admin should enter the following:
Import-VM -Path 'C:\<vm export path>\2B91FEB3-F1E0-4FFF-B8BE-29CED892A95A.vmcx'
However, if admins need to restore or copy the VM, then admins can find additional syntax elements on one of Microsoft's docs pages.


