Torbz - Fotolia
Expand your knowledge of Hyper-V virtual switch types
Admins can create three Hyper-V virtual switch types: external, internal and private. The need for internet access and a secure network can help admins decide which one to use.
Hyper-V virtual switches enable VMs to communicate with each other, the host OS and outside networks across the internet. There are three different Hyper-V virtual switch types, and the type of switch that an IT administrator creates directly effects the resources that are accessible to connected VMs.
Most VMs use an external virtual switch because it provides internet connectivity or access to VMs that reside on another Hyper-V host. Internal and private virtual switches are primarily suitable for server backbone networks and for network segments that must remain isolated from user traffic or internet traffic.
The most important thing for admins to remember about internal and private virtual switches is that they are tied to the hosts that admins create for these switches. If admins attach a VM to an internal or private virtual switch and then live migrate the VM to another Hyper-V host, the VM loses its connectivity to all VMs tied to that specific virtual switch.
Learn the three Hyper-V virtual switch types
Hyper-V enables admins to create three different types of virtual switches: external, internal and private.
External virtual switch. This switch type is bound to a physical network adapter and provides connected VMs with physical network access. VMs connected to a common external virtual switch can communicate with one another. Furthermore, the host OS can communicate across external virtual switches.
Internal virtual switch. Unlike an external virtual switch, an internal virtual switch is not linked to a physical network adapter within the Hyper-V host. Instead, networks tied together by an internal virtual switch are entirely software-defined.
Hosts connected to an internal virtual switch can communicate with one another as well as with VMs that are already connected to an internal virtual switch. However, because internal virtual switches do not utilize a physical network adapter, VMs connected to an internal virtual switch are unable to access any network resources that are not connected to the internal virtual switch. In addition, VMs on an internal virtual switch network cannot access the internet.
Private virtual switch. Similar to an internal virtual switch, private virtual switches exist only as a software construct. VMs connected to a private virtual switch network can communicate with one another, but they cannot communicate with any resources outside of the private virtual switch. In this setup, the host OS is unable to communicate with VMs that exist on a private virtual switch network.
How to create a virtual switch
Hyper-V virtual switch creation is a relatively easy process. Admins can open the Hyper-V manager and select the Hyper-V host server they wish to create the virtual switch. Next, click the Virtual Switch Manager link, which is in the Actions pane. This prompts Hyper-V to open the Virtual Switch Manager.

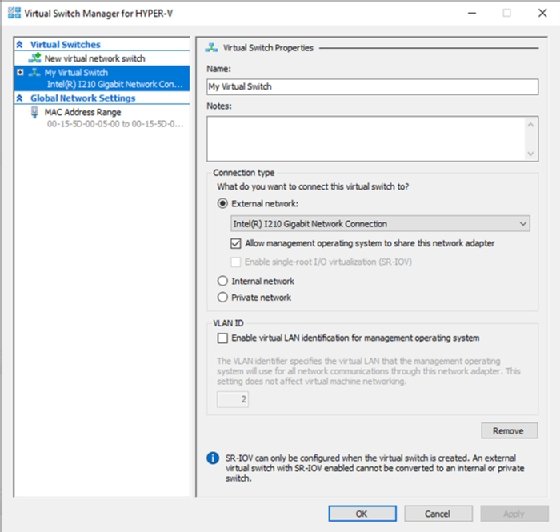
Admins might notice in Figure 1 that one virtual switch already exists. Admins can find this virtual switch, named My Virtual Switch, in the Virtual Switches list. This is an external virtual switch because, beneath the switch name, there is the assigned physical network adapter. Clicking on the virtual switch confirms that this is an external virtual switch and shows any connected network adapters.

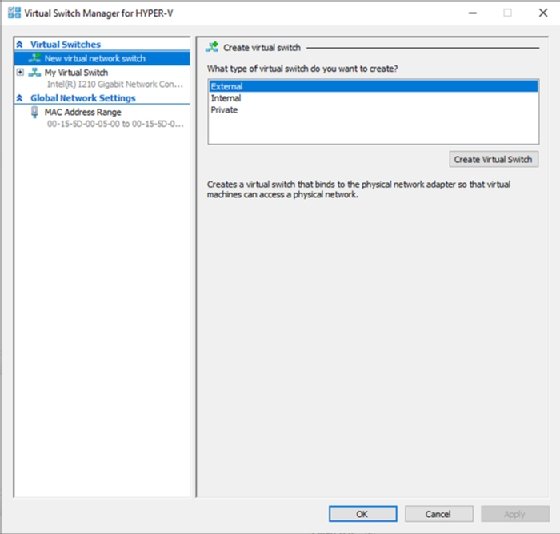
To create a new virtual switch, admins must choose the New Virtual Network Switch option from the Virtual Switches list. Next, admins can decide whether they should create an external, internal or private virtual switch and click the Create Virtual Switch button.

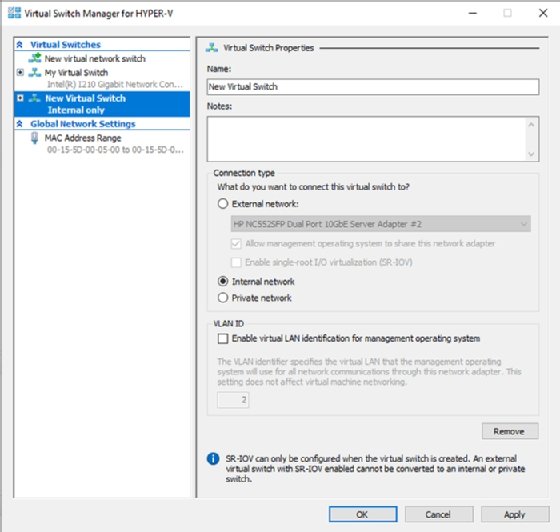
In this screen, admins must assign a name and provide an optional description for their new virtual switch. If admins opt for an external virtual switch, they must choose a physical network adapter to associate with the switch. Otherwise, there is no need to select a network adapter, and admins can just click OK.


