Fotolia
Centralize Ubuntu server management on Landscape
Canonical Landscape brings centralized server management to Ubuntu on physical and virtual machines, as well as cloud systems. See how it works, and explore features such as tagging.
Sys admins with large, diverse deployments might be surprised by the degree to which Landscape helps with Ubuntu server management, in a tool setup that's easy to learn.
The Canonical Landscape tool brings together multiple servers under a centralized management system. It provides Ubuntu server, package and update management and control at scale. With options such as tags, Ubuntu administrators can group servers for updates and other changes.
The Landscape system seems fit for Ubuntu administrators who need a simple way to manage infrastructure updates. While some more advanced features are not available, it has a smaller learning curve than other products that provide centralized server management, such as Red Hat Satellite. The price is also a low barrier to entry.
Canonical Landscape features

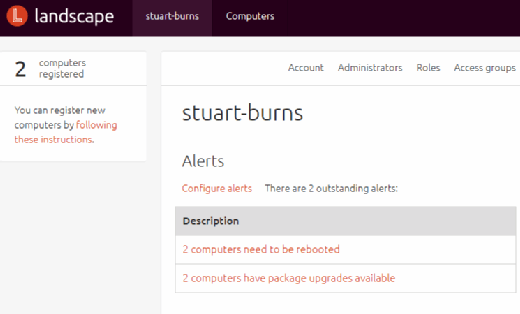
Landscape sends email messages and alerts when upgrades need to be performed, as shown in Figure 1. The user also can block updates or changes from within the GUI. Obviously, this is not recommended in most Ubuntu server management scenarios, but when there is a reason to do so, the option is useful.

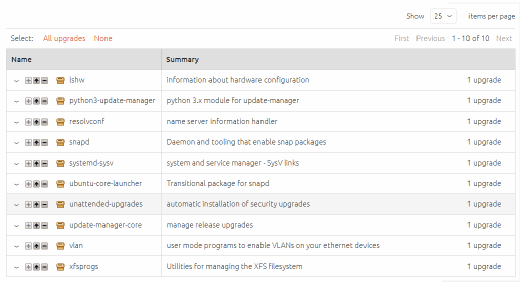
In the example shown in Figure 2, the Wiki server requires an upgrade. The administrator can approve and manage the job from Landscape's centralized server management interface, without going to the system's console. An admin can also schedule those changes to occur at a certain time, such as outside of business hours.
When the number of servers rises, Landscape differentiates between groups of machines, such as production and test, via tags. The user associates a server with a tag -- or several tags -- to more easily manage updates. For example, if production is ready for an upgrade, select the servers tagged as production, and Landscape handles the task. Rinse and repeat as required.
Local or hosted Ubuntu server management?
Canonical Landscape includes numerous options and configurations. Users can install the platform locally or rely on a SaaS version. It is available free for a trial quantity of physical and virtual machines, which are counted as different instances.
On-premises installation of Landscape is not simple. It takes some configuration and can be troublesome for the user to get right. The SaaS version provides the easiest on-ramp to experiment with centralized Ubuntu server management. The SaaS version closely mirrors the locally installed option but does not offer the ability to use custom repositories.
Begin using Canonical Landscape
This overview of working with Landscape relies on the SaaS version of the tool. Experimentation requires a credit card, but Canonical offers $100 of free credit.
Start by navigating to the Landscape homepage, then click Try Landscape. Fill in the lengthy form, and create an Ubuntu single sign-on account if you do not already have one. It is used as the master account for the Landscape system.
Once logged in, install a few client packages on the Ubuntu servers to be managed. These servers can be physical, virtual or cloud-based. Log in using your preferred Secure Shell client, and enter:
sudo apt-get update -y
sudo apt-get install -y landscape-client
The installation might ask several questions. Now, register the server in the management system:
sudo landscape-config –computer-title "My server description" –account-name your_account_name
Once this sequence is completed, the server will appear in the Landscape portal as a pending computer. Landscape will invite you to accept the server into the managed servers group. Then, the Landscape server queries all the packages and versions on the newly introduced server and provides the administrator a list of packages that can be upgraded to the current release versions (Figure 3). As this Landscape for Ubuntu server management tutorial relies on the SaaS version, custom repositories are not available.

An administrator can easily automate these steps to add servers in a post-install routine within an Ubuntu setup, or with a simple bash script, and even add security layers to it.
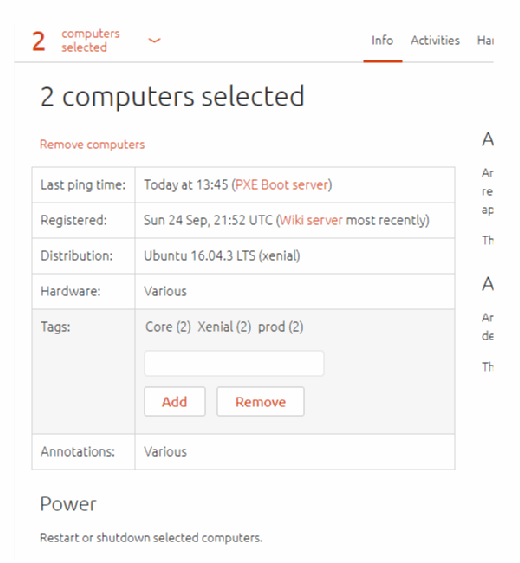
To explore Landscape's centralized server management capabilities, create a simple tagging scheme. Select the machines that you want to group together from the computers menu, and select Info from the tool ribbon. On that page, add or remove tags as needed (Figure 4). Landscape limits the information that can be updated here.

An administrator can use tags to provide updates. A menu on the left-hand side shows a hyperlink with the number of servers to be upgraded. If the admin follows this link, the screen will show all the upgrades Landscape intends to apply. With a few clicks, the changes are applied, and options can be added if desired. Enterprise administrators with a large number of Ubuntu servers in the inventory for this task should consider using the feature to randomize over X minutes.


