Using Remote Desktop Services Manager, RDS CAL
Solutions providers can use the Remote Desktop Services Manager and its tab options to view user information and get expert advice on identifying and adding a RDS CAL.
Solutions provider takeaway: Information on how to use Remote Desktop Services Manager tab options to view user information is valuable to solutions providers. Use this excerpt to learn how to identify and add an RDS CAL and learn about RDS command-line tools.
|
||||
Monitoring Remote Desktop Services
Once Remote Desktop Services is up and running, you'll need to monitor and manage it. Several RDS tools are available from the Start menu by selecting Start ⇒ Administrative Tools ⇒ Remote Desktop Services. The tools are as follows:
- Remote Desktop Services Manager
- Remote Desktop Session Host Configuration
- RemoteApp Manager
- Remote Desktop Web Access Configuration
- Remote Desktop Licensing Manager
- Remote Desktop Connection Manager
- Remote Desktops
Three menu items are available here without the Remote Desktop Services role installed. They are used to manage remote connections for administration and RDS. For example, Remote Desktops (covered in Chapter 14) is used to remotely administer clients and is included in a default installation. The other two items are Remote Desktop Services Manager and Remote Desktop Session Host Configuration.
The Remote Desktop Connection Manager, RemoteApp Manager, and Remote Desktop Web Access Configuration tools were covered earlier in this chapter.
Remote Desktop Services Manager
The Remote Desktop Services Manager is used to view information about users, sessions, and processes on a Remote Desktop Session Host server. You can also interact with sessions from this tool using Remote Control.
When you launch the Remote Desktop Services Manager from the computer hosting the RD Session Host server, the local server will automatically be added. However, if you manage more than one RD Session Host server, you can add all the servers to a single console. For large environments, you can even group the RD Session Host servers using the My Group node in the console.
Users, Sessions, and Processes
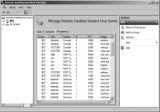
When you're connected to an RD Session Host server, you'll have three tabs available. You can use these tabs to monitor and interact with activity on the server. Figure 25.21 shows the Remote Desktop Services Manager with the Processes tab selected.
Figure 25.21
Remote Desktop Services Processes tab
In the figure, we have clicked the User header to order the list based on the user spelling. Sally is using a RemoteApp application (calc.exe), and Joe has a full desktop running. Notice that only one process is running for Sally, while Joe's session requires several supporting processes.
The three tabs are as follows:
Users This tab lists all the users who have sessions running on the server. It includes sessions that are active and disconnected.
Sessions The Sessions tab shows all the sessions for the server. It includes the RDS supporting sessions: Console, Services, and Listener. If any users connect, it will show their sessions as RDP-TCP#x (where x is the number assigned to the session).
Processes The Processes tab shows all the processes running on the server. You can right-click any process listed here and select End Process to kill it.
The Users and Sessions tabs give you many additional options to interact with sessions. If you right-click any of the sessions, you'll have the following choices:
Connect Allows you to connect to a user's session. When you connect to this session, the user will be disconnected.
This feature will work only when you access it from a Remote Desktop Services client session. It is disabled if you try to access it from the console session.
Disconnect Disconnects a user from an active session. Be nice, though. Send the user a message, and give them some time to clean up and log off before simply disconnecting them.
Send Message Sends a message to a session. The message will appear as a dialog box. The title will include who sent the message and when it was sent.
Remote Control Allows you to connect and interact with a remote session. This can be used to provide assistance to a user by either showing the user how to perform an action or watching and talking them through it. It is very similar to Remote Assistance, covered in Chapter 14, except that you have a lot more control with Remote Control than you'd have with Remote Assistance.
This feature will work only when you access it from a Remote Desktop Services client session. It is disabled if you try to access it from the console session.
Reset Deletes a session. Disconnected sessions still consume resources, so you can use this to delete a disconnected session and free up the server's resources.
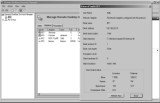
Status Displays a status dialog box, as shown in Figure 25.22.
Figure 25.22
Session status from Remote Desktop Services Manager console
Figure 25.22 was launched by right-clicking the RDP-Tcp#0 session and selecting Status.
Command-Line Tools
In addition to the Remote Desktop Services Manager GUI, you can use several command-line tools to manage users, sessions, and processes in place of the Remote Desktop Services Manager, as shown in Table 25.2.
For more information about any of these tools, enter them from the command line with /? for help. Examples are given for each these with the assumption that a user with a username of Sally has an active session with a session ID of 1.
Table 25.2: Remote Desktop Services Manager Command-Line Tools
|
|
|
| logoff | Logs a user off from a session and deletes the session on the RD Session Host server. The number would the session ID number and can be obtained with query session. logoff 1 |
| msg | Sends a message to a user on an RD Session Host server. The message will appear as a pop-up. Msg Sally Message CTRL + Z Enter |
| query process, qprocess | Displays information about processes running on an RD Session Host server. No arguments are needed. query process |
| query session, qwinsta | Displays information about sessions running on an RD Session Host server. No arguments are needed. This can be used to identify the session ID, the username, and the session name of all sessions. query session |
| query users, quser | Displays information about user's sessions running on an RD Session Host server. This can be used to determine whether the session is active, how long it's been idle, and when the user logged on. If executed without arguments, it shows all information on all users. If executed with the name of an active user, it shows only that user's information. query user query user Sally |
| Tsdiscon | Disconnects an active session on an RD Session Host server. Tsdiscon 1 |
| Tscon | Connects to a disconnected session on an RD Session Host server. Tscon 1 |
| Tskill | Ends a process running in a session on an RD Session Host server. Processes can be identified with the query process command. Tskill mstsc |
Remote Desktop Session Host Configuration
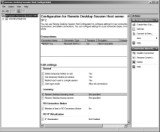
You can use the Remote Desktop Session Host Configuration console to configure many of the settings for your RD Session Host server. Settings in this console will affect all the users who connect to the server. Figure 25.23 shows the configuration console.
Figure 25.23
Remote Desktop Session Host Configuration console
There are three major types of settings you can configure with the majority of the server configuration done through the RDP-Tcp Connection property page.
RDP-Tcp Connection settings You can use the RDP-Tcp Connection properties to configure all the connections to the RD Session Host server. This includes security settings, session settings, remote control settings, and more. The majority of the configuration for the RD Session Host server is done through these properties.
Edit Settings The Edit Settings section shows the current settings for four additional areas. If you double-click any of the areas, you can see the properties sheet with the four tabs that can be used to supplement the RDP-Tcp Connection settings.
Licensing Diagnoses If you are receiving errors related to RDS licensing, you can use the Licensing Diagnoses tool to help you identify the problem. Select this in the tree pane on the left.
RDP-Tcp Connection
You can view and modify the properties of RDP-Tcp Connection by either double-clicking it or right-clicking it and selecting Properties. The properties sheet includes eight tabs.
This connection is available even if the Remote Desktop Services Session Host role has not been installed. Before the role is added, this connection will allow two connections for administrator purposes. When the role is added, it is changed to allow unlimited connections.
You can add connections if your server includes multiple network adapters.
RDP-Tcp Properties General Tab
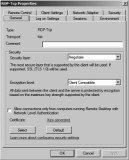
Figure 25.24 shows the General tab. You can add a comment here that may be useful if you have multiple NICs and multiple connections you're using on your RD Session Host server. However, the primary use of this page is to configure security.
Figure 25.24
RDP-Tcp Properties General tab
RDS supports both the RDP Security Layer and Secure Sockets Layer (SSL) (TLS 1.0). SSL (TLS 1.0) is more secure than RDP Security Layer. If the Security Layer is set to Negotiate (as shown in the figure), the RDS server will attempt to use SSL (TLS 1.0) first. If the client doesn't support it, it will use RDP Security Layer instead, which provides weaker security.
Earlier, single sign-on was mentioned, and this is one of the settings you need to verify to support single sign-on. It must be set to Negotiate or SSL (TLS 1.0). You'll also need to verify the "Always prompt for password" option is not selected on the Log On Settings tab.
Additionally, you'll need to use a certificate to use SSL (TLS 1.0). If you installed RDS using the exercises in this chapter, an autogenerated (self-signed) certificate was created and added.
Self-signed or Trusted Certificate
Although you can create a self-signed certificate, Microsoft recommends you obtain a certificate from a trusted certificate authority (CA) for better security. This trusted CA can be a public one such as VeriSign or Thawte or an Active Directory Certificate Services server built internally. However, for small organizations where the server is used internally only, you can use a self-signed certificate without any problems.
You can select from one of four encryption levels. This can encrypt the data sent to and from the server to prevent sniffing attacks. The choices are as follows:
Low Data sent from the server to the client is not encrypted. Data sent to the server from the client is encrypted using 56-bit encryption.
Client Compatible Data is encrypted to and from the server using the maximum key strength supported by the client. This is the default setting.
High Data is encrypted to and from the server using 128-bit encryption. Clients that don't support 128-bit encryption can't connect.
FIPS Compliant Data is encrypted to and from the server using Federal Information Process Standard (FIPS) 140-1 validated encryption methods. FIPS is a series of documents published by the National Institute of Standards and Technology (NIST). When this is selected, clients that don't support FIPS 140-1 encryption can't connect.
RDP-Tcp Properties Log On Settings Tab
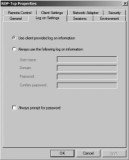
You can configure what credentials are used for sessions through the Log On Settings tab of the RDP-Tcp properties sheet. A user always has to provide their own credentials to determine whether they should be able to access the server, but you can use this page to alter the credentials used for the session.
Figure 25.25 shows the Log On Settings tab.
Figure 25.25
RDP-Tcp Properties dialog box's Log On Settings tab
The default is to use the client-provided logon information. However, you could also create an account with specific permissions and privileges on the RD Session Host server. Then, when users connect and authenticate, the session will start with the credentials you provided. This can be useful if you're hosting an application with special rights and permissions.
The "Always prompt for password" setting has two possible uses. First, if you want to configure single-sign-on as discussed earlier, you would ensure that this box is deselected and the security layer (on the General tab) is set to either Negotiate or SSL (TLS 1.0). However, if your clients frequently access the RDS server from public places and you want to add another layer of security, you can select this box. It will force users to always provide a password even if they've configured their password to be saved. This prevents an attacker from launching an RDS session if a valid user leaves their system unlocked. The attacker will be prompted for a password. As long as the user didn't write down their password on a little yellow sticky attached to the monitor, the attack is thwarted.
RDP-Tcp Properties Sessions Tab
The Sessions tab can be used to override user settings for how to handle disconnected sessions, active session limits, and idle session limits. By default, these settings are configured on a per-user basis using Active Directory Users and Computers.
However, if you want all users who connect to the server to have the same settings, you can use this page to override the individual settings. This tab was covered in more depth in Chapter 14.
RDP-Tcp Properties Environment Tab
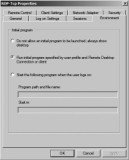
The Environment tab can be used to launch a specific application when a user connects. It's very common to use an RD Session Host server to host a line-of-business application. If you're specifically using RDS to host an in-house application, it makes a lot of sense to launch the app as soon as the user connects.
Figure 25.26 shows the Environment tab. The default setting is shown. You can override this for every user by either specifying that applications should not be launched or identifying a specific application to run when the user logs on.
Figure 25.26
RDP-Tcp Properties Environment tab
To specify a starting application, you simply provide the program path and filename of the application. Some applications require the starting path to be specified so that the application can access specific application data. If necessary, you can specify the path in the Start In text box.
RDP-Tcp Properties Remote Control Tab
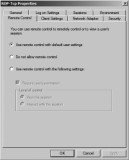
Remote Control is a neat feature available with an RD Session Host server. As mentioned earlier, an administrator can use it to interact with a user's session to either show a user how to accomplish a task or talk a user through the task while observing the actions on the screen.
Figure 25.27 shows the Remote Control tab. The default setting is shown using the default user settings. You can also completely disable remote control or configure remote control with special settings that apply to all users connecting to the server.
Figure 25.27
RDP-Tcp Properties Remote Control tab
When configuring server settings for remote control, you can set it to require the user's permission or not. Additionally, you can configure the level of control to either view the session or interact with the session.
If your company is managing an RD Session Host server, there's nothing wrong with setting it to not require the user's permission in many instances. Although it makes sense to require the user's permission in a peer-to-peer Remote Assistance scenario, it's different when users are connecting to a corporate RDS server.
The user (an employee within the company) is asking for help, and the help-desk professional (another employee within the company) is there to provide assistance. Requiring the help-desk professional to request permission from the employee to connect is often just an extra step that isn't required. Of course, if employees may be accessing sensitive data that the help-desk professional shouldn't see, then requiring the user's permission to connect is appropriate.
If you do set it so that the user's permission is not required, you may want to provide some type of notification to the user that their sessions may be monitored. Many companies provide this notification in an acceptable use policy.
RDP-Tcp Properties Client Settings Tab
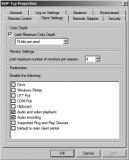
The Client Settings tab is useful if your users are experiencing performance issues. You can reduce some of the capabilities to provide better performance.
For example, you can reduce the color depth if users are connecting over a slow connection. The different settings are 15 bits, 16 bits, 24 bits, or 32 bits per pixel. For most users and most applications, the reduced color depth may not be noticeable, while the increased speed will be greatly appreciated.
Figure 25.28 shows the Client Settings tab. Notice that you can also disable redirection for several devices from this page.
Redirection allows users to access local resources in the remote session. For example, a user may want to be able to access files on their local C drive on their system. With the check box deselected (not selected to disable redirection), they can configure redirection.
Figure 25.28
RDP-Tcp Properties Client Settings tab
A key point is that this page is used to disable redirection on a global scale. If redirection is not disabled, users have the ability to select or deselect redirection for individual items on a per-connection basis. If you refer to Figure 25.18 earlier in this chapter, it shows that the user has several choices for redirection. Users have similar choices if they connect with Remote Desktop Connection.
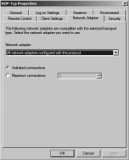
RDP-Tcp Properties Network Adapter Tab
If your RD Session Host server is multihomed, you can configure which network adapters will be used for the RDP-Tcp connections.
Figure 25.29 shows the Network Adapter tab. In the figure, it's set to use all network adapters, but if you select the drop-down box, you'll see that you can select individual NICs.
Figure 25.29
RDP-Tcp Properties Network Adapter tab
When the server is configured as an RD Session Host server, it is set to "Unlimited connections." You can also use the "Maximum connections" setting to limit the number of connections the server will accept. If you find that an RDS server functions best below a certain number of connections, you could configure the maximum connections to this threshold.
You are still legally limited to the number of licenses you've purchased for the server. If you're using per-user CALs, the license server doesn't track the CALs, but you can configure the maximum connections on this page to coincide with the number of licenses you've purchased.
Before you configure a server as an RD Session Host server, the "Maximum connections" setting is set to 2. If Remote Desktop for administration is enabled, the server will support a maximum of two connections.
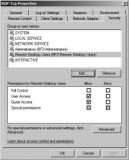
RDP-Tcp Properties Security Tab
The Security tab allows you to modify permissions granted to users (see Figure 25.30). As soon as you select this tab, a dialog box appears reminding you to use the local Remote Desktop Users group to control who can log onto the RD Session Host server.
In other words, you only need to use this tab to modify advanced permissions for a special group. For example, you may have a group of RD administrators that need to be able to do anything on your RD Session Host server. You could use a Windows Global group to organize the users, add them to the Security page, and allow Full Control permissions.
Figure 25.30
RDP-Tcp Properties Security tab
The Security tab includes four permissions:
Full Control Full Control includes the following permissions: query information, set information, remote control, logon, logoff, message, connect, disconnect, and virtual channels.
User Access User Access includes the following permissions: query information, logon, and connect.
Guest Access Guest Access includes only the Logon permission.
Special permissions Any of the following special permissions can be individually allowed or denied: query information, set information, remote control, logon, logoff, message, connect, disconnect, and virtual channels.
Edit Settings
The Edit Settings property page includes four tabs. You can access any of these settings by double-clicking any of the settings in the General, Licensing, RD Connection Broker, or RD IP Virtualization sections.
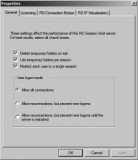
General Tab
Figure 25.31 shows the General tab. It's recommended to keep all the check boxes selected for the best performance of the server. Notice the last check box prevents users from opening more than one session -- this refers to full desktop sessions, not RemoteApp applications. Users will be able to launch multiple RemoteApp applications with this selected.
Figure 25.31
Edit Settings General tab
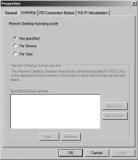
Licensing Tab
The Licensing tab allows you to choose between Per Device or Per User. As a reminder, it's recommended to postpone configuring a licensing server until your RD Session Host servers are up and running. Figure 25.32 shows this tab.
Before the 120-day grace period, you'll need to revisit this page and set the licensing mode. When you select either Per Device or Per User, you'll also need to specify the license server. In very large organizations, you can use multiple licensing servers. A single licensing server can manage licenses for multiple RDS Session Host servers.
Figure 25.32
Edit Settings Licensing tab
RD Connection Broker Tab
RD Connection Broker is needed only if you have more than one RD Session Host server. The RD Connection Broker provides two important features:
Load balancing If you have multiple RD Session Host servers, you can add the servers to a Connection Broker farm. When a user connects, the RD Connection Broker will determine which server has the lightest load and will redirect the connection to that server.
Reconnects users to the correct session If a user becomes disconnected from a session, the RD Connection Broker will ensure they are connected back to the same session on the original server. For example, say that Sally is connected to BF2 but the network has a problem and disconnects her. When she reconnects, the Connection Broker recognizes she has an active session on BF2 and will redirect her connection to that server.
RD IP Virtualization Tab
If an application requires each connection to have a separate IP address, you can use RD IP Virtualization. Normally, every session will have a single IP address. Although this works for the majority of applications, there are a few instances where separate IP addresses are required.
RD IP Virtualization also requires a DHCP server to be configured to provide virtual IP addresses.
Licensing Diagnosis
The last tool you have available in the Remote Desktop Session Host Configuration console is Licensing Diagnosis. When licensing issues crop up, they've been challenging to resolve in past versions of Windows and Terminal Services. This tool is a welcome addition.
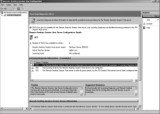
Figure 25.33 shows some of the information provided from the Licensing Diagnosis console.
Figure 25.33
Licensing Diagnosis tab
In the figure, licensing hasn't been configured yet, and RDS CALS have not been added. However, by reviewing the entries in the center panes, the issue is easy to identify. This tool becomes an easy reference to identify any licensing issues.
Remote Desktop Licensing Manager
Although you have a grace period when RDS will function normally, after the grace period ends, RDS will no longer accept connections if licensing is not configured. The grace period lasts for 120 days or until the first permanent RDS CAL is issued by a license server, whichever occurs first.
As mentioned previously, you can choose between per-user or per-device Remote Desktop Services Client Access Licenses (RDS CALs). The licensing server must first be activated before you can install the licenses.
After you've configured your RDS environment, you'll want to configure the license server. The RD Licensing Manager is used to install, issue, and track the availability of RDS CALs on a Remote Desktop license server. Licenses are purchased through a variety of different methods, depending on your company's relationship with Microsoft, such as the following:
- Enterprise Agreement
- Campus Agreement
- School Agreement
- Services Provider License Agreement
- Other Agreement
If you have one of these agreements with Microsoft, the best way to obtain licenses is through this agreement. It's also possible to purchase licenses through retail channels by purchasing a license pack. For detailed information on how to purchase licenses, check out this page: https://docs.microsoft.com/en-us/previous-versions/windows/it-pro/windows-server-2003/cc786167(v=ws.10).
The license server can be on the same server as the RD Session Host server, or for larger implementations of Remote Desktop Services with multiple servers, a single license server will manage licenses for multiple RDS servers.
Older Terminal Services license servers used a discovery scope to allow TS servers to locate the license server. If you're installing the license server on Windows Server 2008 R2, this is not needed. Instead, you should use the Remote Desktop Session Host Configuration tool to specify a license server for the RD Session Host server to use. This is done on the Licensing tab of the RDP-Tcp Connections Properties dialog box where you identify the type of RDS CALs used for the server (per user or per device).
If you've performed the steps in this chapter to install and configure an RD Session Host server, you can configure the RD Licensing Manager by following these steps:
- Launch the RD Licensing Manager by selecting Start ⇒ Administrative Tools ⇒ Remote Desktop Services ⇒ Remote Desktop Licensing Manager.
- Click the plus (+) to expand All Servers, and you'll see your server marked with a white X in a red circle.
- Select your server. Right-click your server, and select Activate Server.
- Review the information on the wizard's Welcome page, and click Next.
- On the Connection Method page, accept the default of Automatic Connection (Recommended). Use this method if the RDS server has access to the Internet. If the server doesn't have access to the Internet, you can connect with another computer over the Internet or via a telephone. Click Next.
- The Company Information page will appear. Enter your first name, last name, company, and country. This information is used if you need help from Microsoft. Click Next.
- Enter the additional information requested on the Optional Company Information page. Click Next.
- A dialog box will appear with a progress bar. The server is connecting to the Microsoft Clearinghouse and is being activated. When it completes, the completion page will appear.
- Deselect the Start Install Licenses Wizard Now check box, and click Finish. At this point, the licensing server is activated, but there aren't any RDS CALs installed.
-
Set Per User or Per Device
It may be necessary to return to the Remote Desktop Session Host Configuration console and set the Remote Desktop licensing mode. After launching the console, double-click the Remote Desktop licensing mode to access the property page. Select Per Device or Per User depending on what type of licenses you have purchased, and enter the name of the license server. - Right-click your server, and select Install Licenses. This will launch the wizard to install your licenses. There are multiple paths this can take, depending on what type of licenses you've purchased and where you've purchased them from.
The Bottom Line
|
||||
Limit the maximum number of connections You can limit the maximum number of connections for the server for performance reasons or to help ensure you remain compliant with the licensing agreement.
Master It You want to limit the maximum number of connections to 100. How can you do this?
Add an application to an RD Session Host server Once the RDS role is added and the RD Session Host server is configured, you can add applications to make them available to the server.
Master It Your company has purchased an application that supports multiuser access. You want to install it on the RD Session Host server. What should you do?
Add a RemoteApp for Web Access RemoteApp applications can be configured so that they are accessible to users via a web browser. Users simply need to access the correct page and select the application to launch it.
Master It Assume you have already configured your environment to support RemoteApp applications. You now want to add a RemoteApp application. What should you do?
Add a RemoteApp to the Start menu RemoteApp applications can be configured so that they are accessible to users from the Start menu of their system. Once configured, users simply select the item from their Start menu to launch it.
Master It Assume you have already configured your environment to support RemoteApp applications. You now want to add a RemoteApp application so that it is accessible to users via the Start menu. What should you do?
![]()
![]() Installing, Using, and Administering Remote Desktop Services
Installing, Using, and Administering Remote Desktop Services
![]() Using Remote Desktop Services for Windows Server 2008 R2
Using Remote Desktop Services for Windows Server 2008 R2
![]() Remote Desktop Services: Server and client requirements
Remote Desktop Services: Server and client requirements
![]() Adding Remote Desktop Services and RemoteApp programs
Adding Remote Desktop Services and RemoteApp programs
![]() Using Remote Desktop Services Manager, RDS CAL
Using Remote Desktop Services Manager, RDS CAL
Printed with permission from Wiley Publishing Inc. Copyright 2010. Mastering Microsoft Windows Server 2008 R2 by Mark Minasi, Darril Gibson, Aidan Finn, Wendy Henry and Byron Hynes. For more information about this title and other similar books, please visit Wiley Publishing Inc.
