Setting up and installing applications in Windows XP Mode
After installing Windows XP Mode on Windows 7, you will need to set it up properly. Follow the steps in this chapter excerpt to perform tasks such as installing applications.
Solution provider's takeaway: After installing Windows XP Mode, you will need to concentrate on a proper setup. Check out how to install Windows XP Mode applications in this chapter excerpt.
Setup of Windows XP Mode
We now have Windows XP Mode installed, but we still need to set it up. Remember this is a separate implementation of a full operating system. You must go through the first time use setup of Windows XP just like it is installed on a stand-alone computer. The big difference is that, this time, it will be available to both Windows XP and Windows 7. The following steps will get you through it easily.
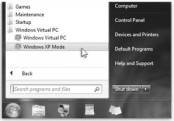
Figure 9.19: Start Menu Selection
- When your computer has restarted, click the Windows 7 Start button , then select All Programs | Windows Virtual PC | Windows XP Mode to begin setup as shown in Figure 9.19.
- You will be presented with a licensing screen. Please read the licensing terms and click I accept the license terms when ready, and then click Next as shown in Figure 9.20. You can click the Printable version link if you want to print the agreement.
- Next, you must verify the installation folder and set up a password for the XPMUSER account. This is a required account that is automatically created. It is the default account used to run Windows XP Mode and any virtual applications installed in the virtual instance of Windows XP with SP3. You would normally need to enter this password when starting the Windows XP Mode. If you do not want to enter the password each time you start Windows XP Mode, you can store the credentials by checking the Remember credentials check box. Figure 9.21 shows the Installation folder and credentials screen.
- Verify the installation folder listed at the top of this screen. It should be the same folder you selected when you installed Windows XP Mode in the previous section. If not, click the Browse button and find the installation files. Enter an appropriate password for your password rules. Reenter the password again. Click Next when ready to continue. Any authorized user accessing an application running in Windows XP Mode will use these credentials.
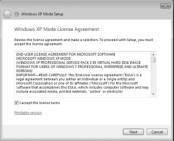
Figure 9.20: Windows XP Mode License Screen
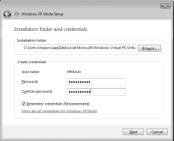
Figure 9.21: Installation Folder and Credentials
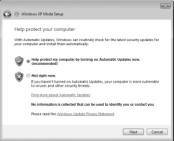
Figure 9.22: Automatic Updates
- You need to set up Automatic Updates next. As shown in Figure 9.22, you can select an option to automatically download and apply the updates or to turn this service off. For this service to function properly, both the host Windows 7 computer and the Windows XP Mode virtual desktop must be able to connect to the Internet. It is recommended that Automatic Updates be enabled. Click Next to continue.
- Setup will now configure drive sharing. Drive sharing will allow files to be shared between both the Windows 7 operating system and the Windows XP Mode. Applications can pass data between the two operating systems with copy and paste seamlessly. Click Start Setup as shown in Figure 9.23.
- The setup process will start. Figure 9.24 shows you the progress screen. This may take a few minutes, so be patient.
- Once the installation is complete, you will be automatically logged on to the new virtual machine. The hardware will be identified as Windows XP Mode starts up. Figure 9.25 shows the virtual desktop for Windows XP Mode.
- Next, you will need to apply any additional updates for Windows XP. You should see the Automatic Updates icon in the lower right corner. This is shown in Figure 9.26. Double-click this icon to start the update process.
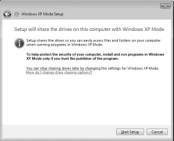
Figure 9.23: Setup Drive Sharing
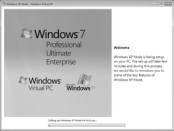
Figure 9.24: Installation Progress Screen
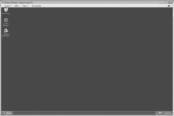
Figure 9.25: Windows XP Mode Desktop

Figure 9.26: Automatic Update Icon
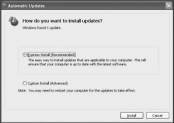
Figure 9.27: Automatic Updates
- You should see the familiar Automatic Updates screen as shown in Figure 9.27. You have two choices:
a. Express Install -- This option will install all the recommended and critical updates.
b. Custom Install -- This option will list all the available updates and allow you to select the ones you want to install.
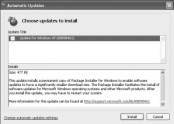
Figure 9.28: Custom Install
Since this is a virtual machine and we are only using it to run applications that will not run in Windows 7, the Express Install is the recommended choice. We are only interested in the recommended and critical patches in mostly all instances. If you require any additional updates for your specific application, then choosing the Custom Install will allow you to be selective. Figure 9.28 shows this option. Click Install for either option to install the updates.
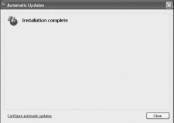
- Congratulations! All the recommended updates have been applied. Figure 9.29 will be displayed when all the updates have completed. Click Close.
Install an Application in Windows XP Mode
Now that we have Windows XP Mode installed and setup, we need to load an application. These applications will run in a separate memory space and will be isolated from Windows 7 applications. Although mostly all applications can be configured to work with Windows 7, there are a few that either will not work or work better if they are running on Windows XP. A good example may be that a custom application was built on Microsoft Access XP. This application is the remaining application that has not been migrated to Microsoft Access 2007/2010. You must load Access XP into Windows XP Mode. The following steps will show you the process of loading an application into Windows XP Mode.
Warning
Windows XP Mode does not include any antivirus protection. You need to load an antivirus program even if you already have one loaded on the host Windows 7 computer.
Figure 9.29: Installation Complete
Figure 9.30: Windows XP Mode Menu Bar
- To start Windows XP Mode, click the Windows 7 Start button, then select All Programs | Windows Virtual PC | Windows XP Mode as shown in Figure 9.19.
- Insert the software CD into the CD- or DVD-ROM or mount an International Organization for Standardization (ISO) file to Windows XP Mode. To mount an ISO file click Tool | Settings… from the top menu in the Windows XP Mode window as shown in Figure 9.30.
a. Select the DVD drive from the list of devices as shown in Figure 9.31.
b.If you have more than one physical DVD drive, you can select the one you want to use by clicking the Access a physical drive radio button and selecting the desired DVD drive letter from the pulldown box. If you have an ISO image you want to use, just click the Open an ISO image radio button. Click the Browse button. Select the ISO image you want to mount as shown in Figure 9.32 and click Open to continue.
c. Regardless of your installation media choice, once you have made your selection, click OK to continue.
- Select the setup program and start the application install. Figure 9.33 shows an application ready to install.
- Follow the installation instructions for your application.
- Once the application is completed, you can run the application in Windows XP Mode by clicking Start | All Programs and selecting
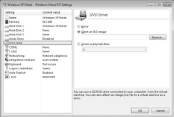
Figure 9.31: Virtual Device Settings
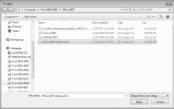
Figure 9.32: Selecting an ISO Image File
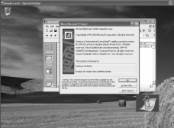
your application. The application should start up as it normally would in a Windows XP desktop. Figure 9.34 shows Microsoft Project 2000 running in the Windows XP Mode desktop. - Congratulations! You have loaded an application into a virtual machine. What does this means to you and how does it help your situation? Go ahead and close the application and log off Windows XP Mode and close the window. You will receive a message that The Windows XP Mode is hibernating.
-
Figure 9.33: Application Installation
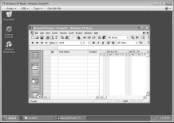
Figure 9.34: Application Running in Windows XP Mode
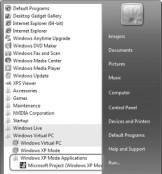
- Click the Windows 7 Start button | All Programs | Windows Virtual PC | Windows XP Mode Applications as shown in Figure 9.35. Notice your application is listed.
- Double-click this application. You will receive a message that Windows XP Mode is being enabled and your application starts up as shown in Figure 9.36.
- As you use your application, you will discover that it performs as it normally would if it was installed locally on the Windows 7 desktop directly. Figure 9.36 also shows that this is Microsoft Project 2000 running in Windows XP Mode.M
- Congratulations! You have successfully installed and configured Windows XP Mode and loaded and run an application from both the Windows XP Mode desktop and the Windows 7 Start menu.
Figure 9.35: Windows XP Mode Applications
Figure 9.36: Application Running in Windows XP Mode
![]()
![]() Virtualization and Windows 7
Virtualization and Windows 7
![]() Installing Windows XP Mode on your customer's Windows 7
Installing Windows XP Mode on your customer's Windows 7
![]() Setting up and installing applications in Windows XP Mode
Setting up and installing applications in Windows XP Mode
![]() How VARs can use virtualization on a Windows 7 desktop
How VARs can use virtualization on a Windows 7 desktop
About the author
Jorge Orchilles holds a master's degree in science in management information systems from Florida International University and is currently a security analyst at a Fortune 20 financial institution.
Printed with permission from Syngress Publishing. Copyright 2010. Microsoft Windows 7 Administrator's Reference by Jorge Orchilles. For more information about this title and other similar books, please visit http://scitechconnect.elsevier.com/category/computer-security/.
