Part of:Understanding the role of Windows 10 IoT in business
How to enroll Windows IoT devices in Microsoft Intune
Managing Windows IoT devices starts with the proper enrollment, and administrators can take advantage of Microsoft Intune's capabilities to unify endpoint management.
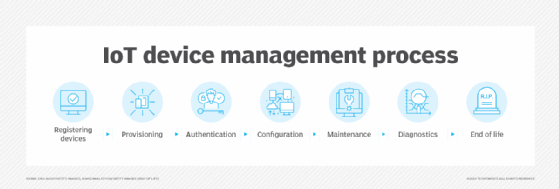
Device management has evolved in the enterprise to cover more and more devices under one platform, and IoT devices are no exception.
Organizations can enroll devices running Windows IoT with Intune and manage them alongside Windows desktop OSes, smartphones, tablets, macOS desktops and even some Linux distributions. However, the enrollment and management process for IoT devices is unique.
IT administrators that manage Windows IoT endpoints for purposes such as digital signage, thin clients, kiosks, sensors and medical devices, should learn the different management and enrollment options for their IoT fleet.
Different editions of Windows for IoT
As organizations plan how to manage Windows IoT devices, it's good to start with a brief overview of the available Windows editions that they can run. The different editions also come with different management options:
Windows IoT Enterprise. This is a full version of Windows Enterprise that also includes some specific features to create dedicated devices that are locked down to a specific scenario.
Windows Server IoT 2022. This is a full version of Windows Server 2022 that provides enterprise management and security features to IoT systems. The main differences are in licensing and distribution.
Windows 10 IoT Core. This is the smallest edition of Windows 10. While only running a single app, it still contains the management and security features that are known from Windows 10.
Windows IoT Enterprise is the most common edition that is used for fixed-purpose devices. And it's also the edition that fits the easiest in the most common Microsoft-focused unified endpoint management strategies. Something similar is applicable to Windows 10 IoT Core. However, given that this system is only Windows 10 and not Windows 11, it's not an obvious choice when looking at the support timeline of Windows 10.
The management capabilities for Windows IoT Enterprise devices are similar to other Windows Enterprise licensed devices -- mainly because they're based on the same binaries so the management is similar as well.
Options for managing Windows IoT Enterprise
The management capabilities for Windows IoT Enterprise devices are similar to other Windows Enterprise licensed devices -- mainly because they're based on the same binaries so the management is similar as well. The following management options are available:
Microsoft Intune. This is the most common platform for managing Windows IoT Enterprise devices via a cloud-based device management service. It provides similar management capabilities as other Windows Enterprise devices.
Microsoft Configuration Manager. This is the device management platform for Windows IoT Enterprise devices when a cloud-based platform is not available or not an option. It provides similar management capabilities as other Windows Enterprise devices.
Azure Arc-enabled servers. Administrators can use Azure Arc-enabled servers to connect to Windows IoT Enterprise devices. They provide the ability to monitor performance, discover apps, collect log data and audit settings.
How to enroll Windows IoT Enterprise devices into Microsoft Intune
The most common method for managing Windows IoT devices is by using Microsoft Intune. As the binaries are similar to Windows Enterprise, the most obvious choice for enrolling Windows IoT devices might seem to be Windows Autopilot.
However, at the time of publishing, Windows Autopilot is not yet supported for Windows IoT Enterprise. That doesn't mean that Autopilot can't perform the enrollment, but it does mean that, if there are any issues related to that SKU, then Microsoft won't fix it. So, that makes bulk enrollment via a provisioning package the most obvious alternative.
How to create an Intune provisioning package
The creation of a provisioning package is a straightforward process if admins use Windows Configuration Designer. Windows Configuration Designer itself is available for download via the Microsoft Store. After installing Windows Configuration Designer, simply follow these eight steps to create a provisioning package that can enroll Windows IoT Enterprise devices into Microsoft Intune:
Open the Windows Configuration Designer app, and click Provision desktop devices.
On the New project dialog box, specify the following information, and click Finish:
Name. Specify a name for the project.
Project folder. Specify a location to save the project.
Description. Specify a description for the project -- this step is optional.
On the Set up device page, specify the following information, and click Next:
Device name. Specify a naming standard for the devices that can include the serial number -- %SERIAL% -- or a random set of characters -- %RAND:x%.
Enter product key. Specify a product key to upgrade Windows -- this step is optional.
Configure devices for shared use. Select if the devices will be shared devices -- this step is optional.
Remove preinstalled software. Select if the preinstalled software will be removed -- this step is optional.
On the Set up network page, specify the Wi-Fi network -- though this step is also optional -- and click Next.
On the Account Management page, specify the following information, and click Next:
Manage Organization/School Accounts. Select Enroll in Microsoft Entra ID.
Refresh Microsoft Entra ID credentials. Select Yes.
Bulk token expiry. Select when the bulk enrollment token will expire.
Get bulk token. This authenticates the admin to retrieve the bulk enrollment token.
The admin can specify credentials with the Create a local administrator button if they want.
On the Add an Application page, add the applications that must be provisioned, and click Next.This step is optional.
On the Add a certificate page, add the certificates that must be provisioned, and click Next.This step is optional.
On the Finish page, verify the specified configuration, and click Create.
How to apply a provisioning package for Intune
On new devices, administrators can apply the provisioning package during Out of Box Experience (OOBE). Admins can perform a similar task when using Windows Autopilot preprovisioning.
During OOBE, instead of providing a work or school account, simply press the Windows key five times. That provides the user with the option to install a provisioning package. Make sure that the provisioning package is available, and click Install provisioning package. That automatically starts the process to set up the PC and confirm the provided provisioning package so it joins Microsoft Entra and automatically enrolls into Microsoft Intune.
Alternatively, admins can apply the provisioning package on existing devices. They can do this by simply double-clicking the package, allowing it to run and trusting the source.
Peter van der Woude works as a mobility consultant and knows the ins and outs of the ConfigMgr and Microsoft Intune tools. He is a Microsoft MVP and a Windows expert as well.