OpenOffice 2.0 tutorial: Using SQL View, Query Design and more with Report Writer
Learn how to use the Query Design and SQL View tools, handle report-specific fields, print fast reports and more in this tutorial on OpenOffice's Report Writer.
In this tip, I'll offer how-tos on the primary tools needed for getting creative with reports from OpenOffice 2.0. I'll cover these topics:
- Reviewing Report Writer, in which I'll identify the wizard's most useful tool;
- How to exploit the Query Design tool and the SQL view, which are not technically specific to reports, but useful on them;
- Handling report-specific fields, especially how to add calculated fields to any report document;
- Printing fast reports, covering printing the contents of a table or query in the blink of an eye; and,
- Creating your own Reports using the Next Record Field, which gives you a bit more control over formatting.
You don't have to know SQL to get advanced reports from OpenOffice 2.0, and what you need to know about SQL is pretty simple. But SQL know-how will help you do the important parts. For instance, printing the total of all values for a field on a report requires simple SQL and multiplying two fields together; while very easy, these are technically SQL functions.
You're going to expand your report-writing options, if you think outside the wizard and are willing to do a little fiddling with some other windows. One allows you to drag the contents of a query or table into a Writer doc, and the other lets you insert fields from, about or which control, a table or query. I'll get into those further along in this article.
The Report Writer tool: A quick review
Select the table or query (just one per report) that you want to use, and then insert the fields. If you need to combine fields from two tables or queries, you need to create a query containing them before you create the report. Click Next.
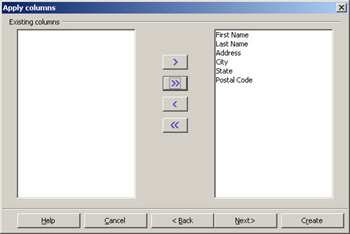
Follow the wizard through. At the grouping window, you can group the information by one or more of the fields.
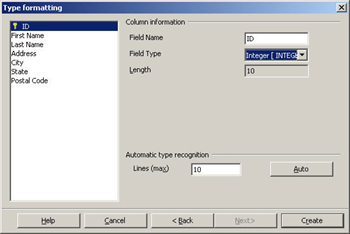
When you're done, the report looks like this. The grouping is set up by Item ID, as I specified in the wizard. The grouping is a nice feature of the report writer; everything else is just the convenience of the wizard interface, and templates. (If you're able to add page numbers to footers, and you don't need clip art, the templates aren't that much of an advantage, either.)

The report wizard doesn't actually create any new data for you with no totals or averages. It's just about the arrangements. If there is anything you want to print that's beyond the data in the table, you need to accomplish:
- before creating the report, in the query
- or after creating the report, with a calculated field.
Handling the Query Design tool and SQL View
| UnitPrice | QuantityPurchased | TotalAmount |
[entered] |
[entered] |
[calculated] |
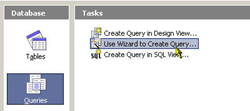
If you want to be able to have calculated information on a report or just available in the database, you need to create that calculation in a query or view. Luckily, it's easy. Open your .odb database file, and click the Queries icon or the View icon. Then, either edit an existing query by right-clicking on it and choosing Edit, or click the option to create a query or view in design view. I'll be using queries in this example.
You'll see this window. For the purpose of this example, let's say I'm creating a new query.
Select at least one table and click Add. Then double-click each field that you want to have in the query just as is, reflecting the data without doing anything about it. (You don't have to -- your query can be entirely composed of calculations based on fields that aren't even in the query.)
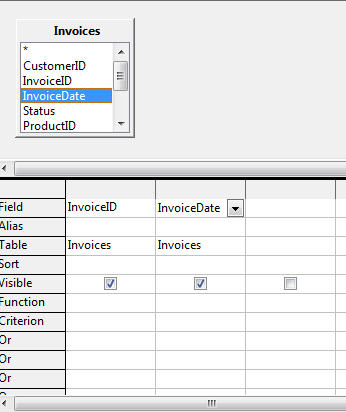
I want this query to show the invoice ID, the date and the total amount of the invoice. So, I'm going to add that calculation. All I need to do, in the area where a field name would normally show, is to type fieldname*fieldname and press Enter. You could put double quotes around the fieldnames but you don't have to since Base will add them automatically.
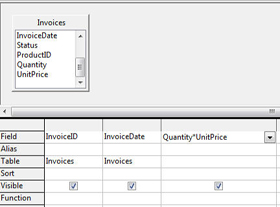
If you want to, you can type an alias for the new field, like TotalAmount, in the field below the calculation.

Run the query, and it looks like this:
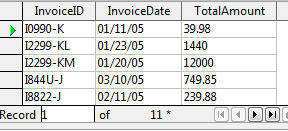
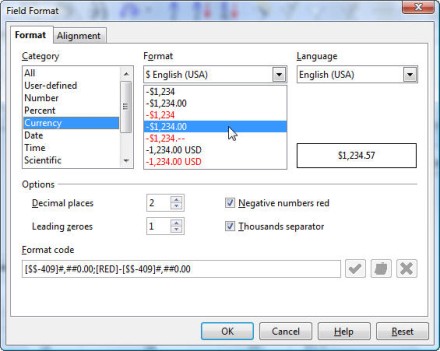
To add formatting, right-click on the fieldname and choose Column Format. Select the formatting you want from the window that appears, then click OK.
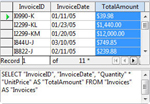
If you want to see this query or any query in SQL, just choose View > Switch Design View On/Off.
Of course, multiplication isn't the only thing you can do. Here are some very basic but useful examples. In each, when an alias is mentioned, creating the alias is optional. You can't easily refer to aliases in subsequent calculations, so the purpose of using an alias for the calculated field is to make your query or report look more professional.
| Task | In Design View (syntax) | In SQL (syntax) | In SQL (example) |
| Concatenate two fields | "fieldname"+"fieldname" (fields will be added if they are both numeric values) | "fieldname" + "fieldname" AS alias | "InvoiceID" + "Date" AS "FullIdentifier" |
| Add the value of one column in one record to the value of another column in the same record | Same as concatenation; just be sure that both fields are numeric. | ||
| Multiplication, subtraction, and division | Same as addition. Be sure both fields are numeric. | ||
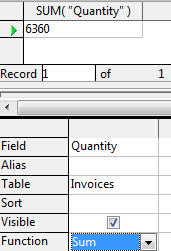
| Sum the value of every record of one field. | Select the field and in the Functions line, select the SUM function. (If there are other fields to the left of this field, select GROUP as the function for all of them.) | Select SUM(fieldname) FROM tablename AS alias | SELECT SUM( "Quantity") FROM "Invoices" AS "Invoices" |
| Get the average maximum, minimum,or count of the values in a column | Same as Sum, but use the appropriate function: MAX MIN COUNT AVG |
How to handle report-specific fields
This doesn't show the total I want. It just shows the total per invoice.
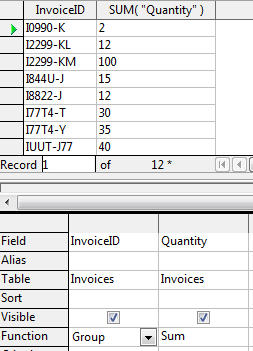
So what do you do if you just want the total (or average, or maximum) for all the information in the report, just printed once at the bottom or top of your report?
You create a calculated field on the report document itself, using the fields usually reserved for creating forms. You can do this on reports created with the wizard, but not with the approaches covered in the next section.
- Create your report.
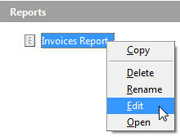
- Close it and save it. Click the Save icon in the report database. The right-click on the name and choose Edit to open it again and edit the layout.
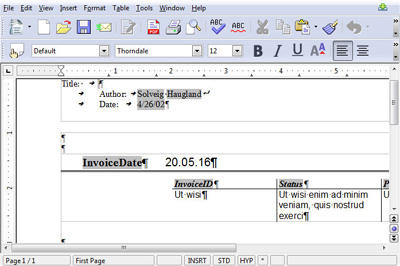
- You'll see the report:
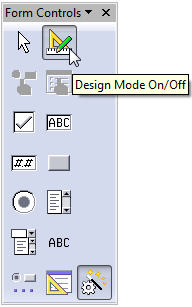
- Choose View > Toolbars > Form Controls. If most of the icons are dimmed, click the Design View icon to switch to design view so you can use the controls.
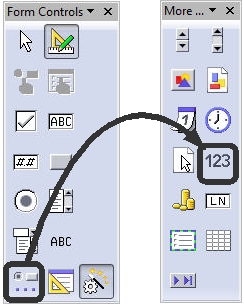
- Click the More Controls icon. Then in the More Controls toolbar palette that appears, click the Numerical Field icon. You're going to draw a field.
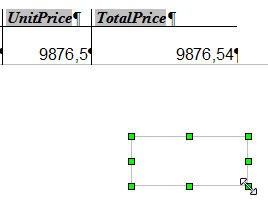
- Scroll over to where you want the field. Draw it, making sure to draw it outside the table.
- Right-click on the field and choose Form (not Control -- not yet.)
- In the Form Properties window, click the Data tab and type the following command:
Syntax
- Select SUM (field you want to sum) as the name you want to give this field from the query or table that the report is based on.
Example:
Select SUM (TotalPrice) as TotalForReport from InvoiceWithTotalPrice
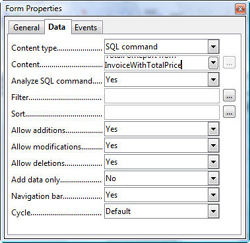
Be sure that the Analyze SQL Command field is set to Yes.
- Close the window.
- Right-click on the field and this time choose Control.
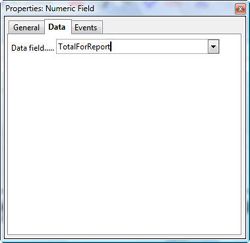
- In the Control Properties window, click the Data tab and type the name you gave this calculated field. In this example, it's TotalForReport.
- In the General tab, specify a thousands separator, if you want, then set any formatting options you want.
- Close the report, saving the changes, and then click the Save icon in the database window. This is important. If you don't save before re-running the report, you won't see the field.
- Double-click the report name. The report will open and you'll see the field. Re-edit the report as necessary to change column widths, adjust the formatting of the field, etc.
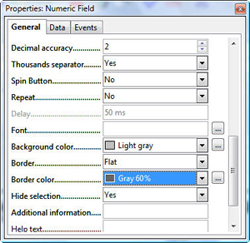
Close the window.
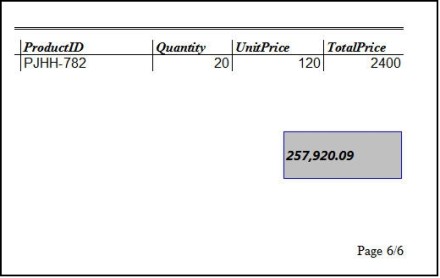
You can create the fields at the top or bottom. Make sure to use AVG, MAX, MIN or other functions and so on.
Fields
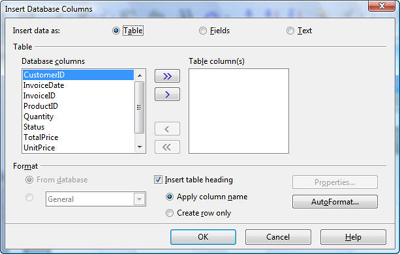
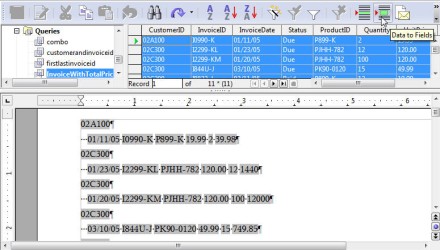
If you want the data to be fields that stays connected to the database, select the Fields option. Insert the fields you want, one-by-one. Type a space between each field, and press Return to go to the next line. Select a paragraph style if you want, then click OK.
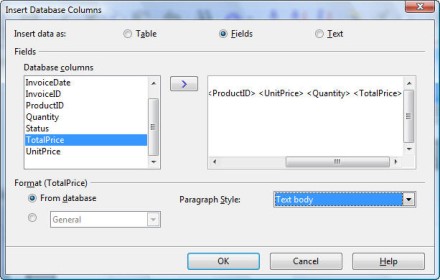
The data will appear, usually with a message saying the data is incorrect. It's not; click the Data to Fields icon shown.
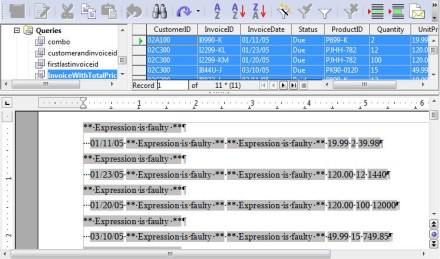
The data will appear correctly.
Text in a table
Select the Table radio button. Insert any fields you want, then select formatting options by clicking the Table or AutoFormat buttons.

Click OK and the data will appear. The example here shows the formatting for the autoformat I chose.

Choose Table > Table Properties to modify the table.
Just Text
Select the Text radio button. Select and insert the fields you want, adding spaces or carriage returns as necessary.

Click OK and the data will appear.

You can search and replace spaces with tabs, then set tabs to align correctly. Press Ctrl F, search for one or more spaces, click More and select Regular Expressions, and replace with /t.
How to create reports using the Next-Record Field
[use the graphic birthdays.jpg or the following table, either way.]
| Name | Address | Birthday |
| John Bertram | 401 East Mulberry | June 21, 1964 |
| Miranda Worthington | 12 Ludlow | April 9, 1971 |
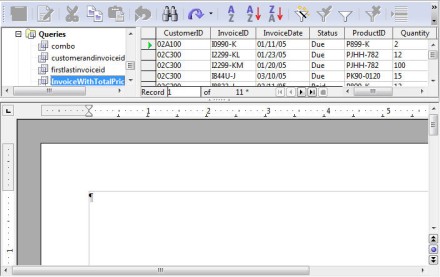
Here's what you do to get a nice layout, a connection with the database and multiple records on the same page. You drag out each field separately, separating with tabs or the like. Paste that row of fields into the next line and insert the Go to Next Record field in front of that second line. Then copy that second line all the way down the page.
- Create a new text document and press F4.
- Click the + icon to expand the database and table or query you want to use.
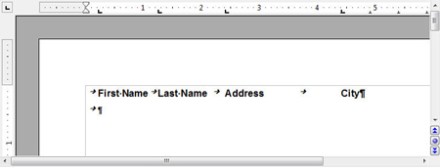
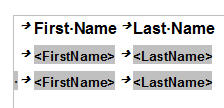
- Create some headings and set the tabs as appropriate. And, for a reason that will become clear in a second, press a tab before you type the first heading. It should look like this.
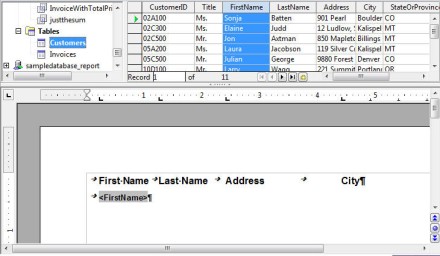
- Click on the first field you want -- the title of the field, not the data. Drag it into your document under the first line of headings.
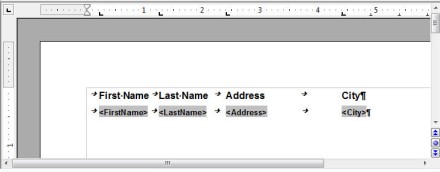
- Press Tab and drag the next field into the document. Keep going until you're done.
- Select the entire line. Copy it, press Return at the end of the line and paste it. You now have two lines of fields, and all lines have a tab preceding them.
- Click at the beginning of the second line of data, before the tab.
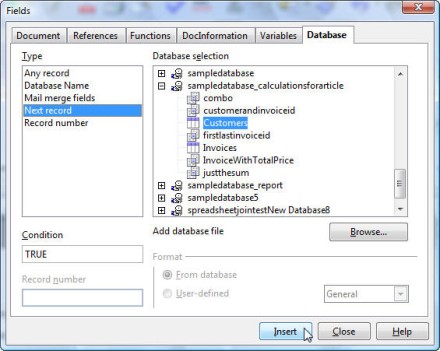
- Choose Insert > Fields > Other. In the Databases tab, select Next Record in the Type column, then select the database and table or query you're using, and click Insert.
- The field appears, but only as a faint gray field. This is why you created the tabs, so that you could see the inserted Next Record field. If you insert it next to another field, it's difficult or impossible to see, and it's hard to be certain you've selected it.
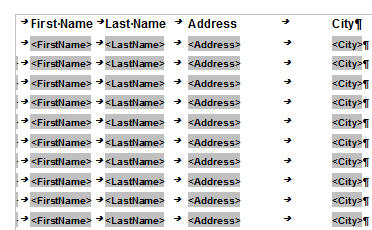
- Now, it's time to copy that line down through the rest of the document. Copy the line with the Next Record field preceding it, and copy it until you've filled the document.
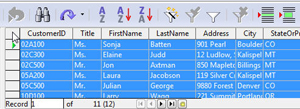
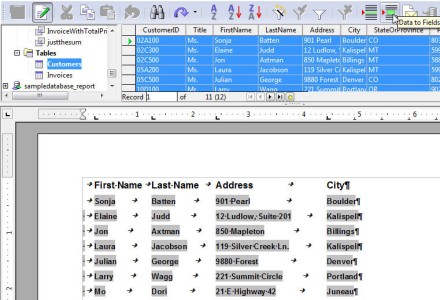
- Click the gray square indicated, to preview your data.
- Click the Data to Fields icon. You'll see the data in the document. The gray Next Record field won't print.


Benefits of advanced OpenOffice tasks
Feeling a little tired? You should. This is a typical OpenOffice process, in that you can do lots of advanced procedures, but what to do is not obvious. In OpenOffice, there are usually several approaches, each with its own benefits and drawbacks. It's good to have a choice, but you have to know how to exploit the choices. These tips should give you some options.
Work is being done on Report Writer, and it will get more civilized. That's life on the frontier of office suites. My advice is to make the best of things until the report tool gets a bit more civilized. Enjoy the adventure of being a pioneer.
Solveig Haugland has worked as an instructor, course developer, author and technical writer in the high-tech industry for 15 years, for employers including Microsoft Great Plains, Sun Microsystems,and BEA. Currently, Solveig is a StarOffice and OpenOffice.org instructor, author, and freelance technical writer. She is also co-author, with Floyd Jones, of three books: Staroffice 5.2 Companion, Staroffice 6.0 Office Suite Companion and OpenOffice.Org 1.0 Resource Kit, published by Prentice Hall PTR. Her fourth book, on OpenOffice.org 2.0, is coming this summer. For more tips on working in OpenOffice, visit Solveig's OpenOffice blog.
Did you find this tip useful? Email us and let us know.
